Taking a screenshot on your dell laptop is easy.
Actually there are multiple ways of doing it.
You want to send a picture of whats happening on your screen to your friend. Maybe you seeing something interesting that’s happening on a YouTube video that you are watching.
Whatever the reason we got you covered.
Take screenshot with keyboard keys
This is the easiest way, you use a combination of keys to take the screenshot.
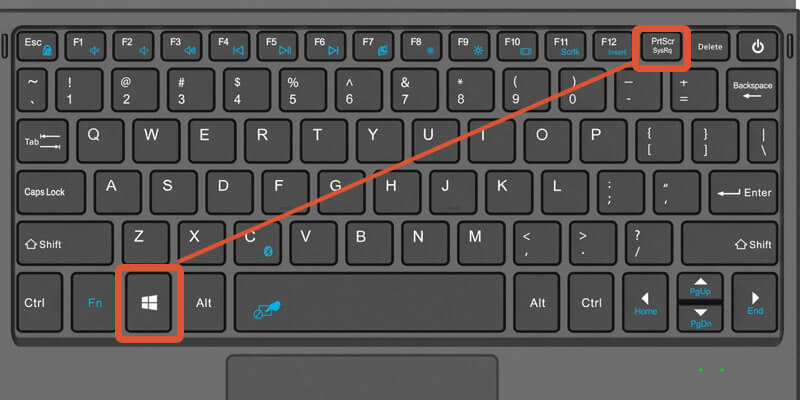
- Go to the part or window on your computer you want to take a screenshot of.
- Simultaneously press the Windows Key and PrtScr Button on your Dell keyboard.
- The screen will dim a bit as it takes the screenshot.
- Your screenshot is saved in the screenshots folder in Pictures folder.
Cant find the screenshot, Click this PC on your computer, then open the C: Drive. Select users, then the name of your computer, then pictures and you should see the screenshots folder.
Alternatively click Pictures on the left side bar of your computer and select screenshots.
Use Print Screen Button to take screenshot
This method will show how to use the print screen button and save the image where you want using windows paint or Microsoft word.
Go the page or window which you want to take screenshot of. Now press the PrtScr button on your laptop keyboard. Its near the, Home, End PgUp and PgDn buttons.
Now press start and type paint to search for windows paint
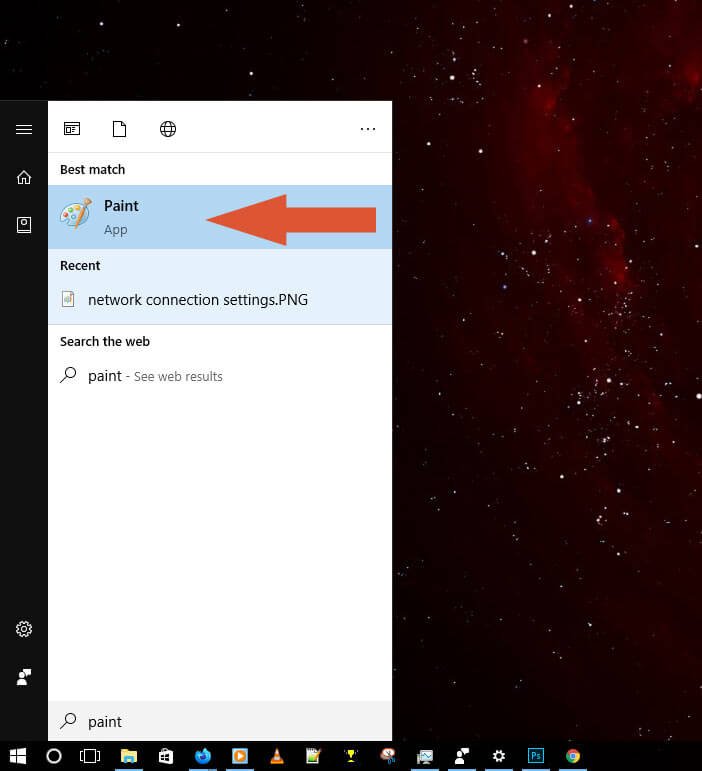
Click on paint to open the paint program.
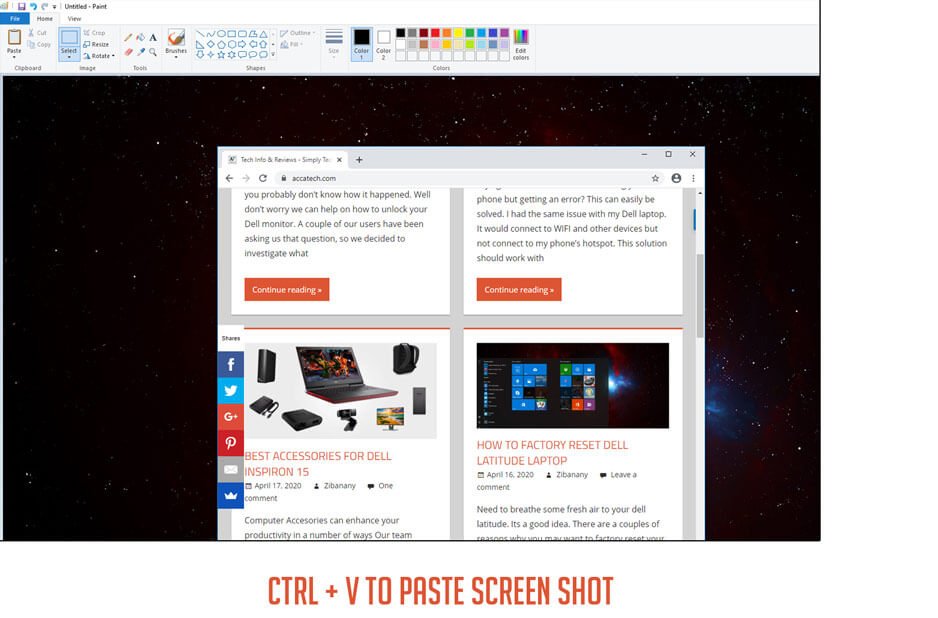
Now with the paint window open Press Ctrl + V on the keyboard. You can achieve the same thing by right clicking on the white space in Paint then select paste.
To save your image click on, File then select Save as. Select Pictures or browse to where you want to save the image, type the name of the image and click save.
The above methods work in windows 10, windows 8 and 7 on your dell laptop.
How to screenshot using the snipping tool.
Another nice feature Microsoft has built into windows is the snipping tool. The best part is, it allows you to save all or a portion of the screen.
So if you want to save part of the screen and not the whole screen use the snipe.
of course you can take the whole screen and crop it later but that’s a lot of work.
Screenshot with snipping tool
- Open the window of what you want to take a screenshot of.
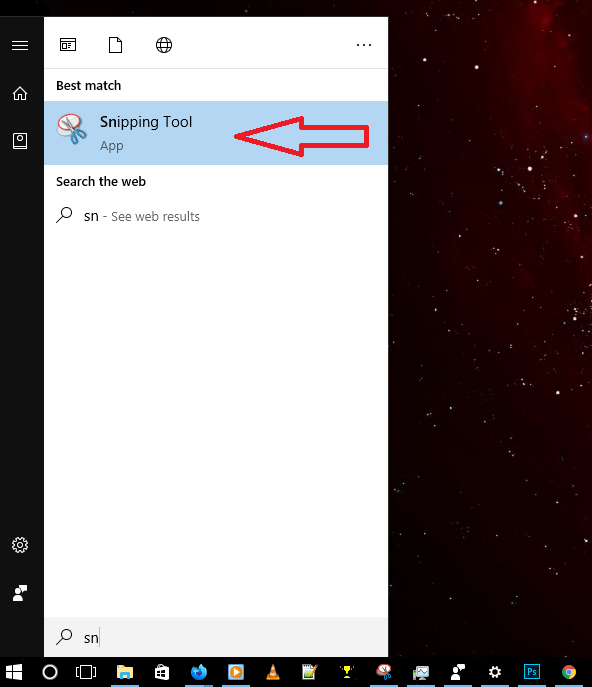
- Now Press Windows key to start.
- Search for snipping tool.
- Click on the snipping tool.
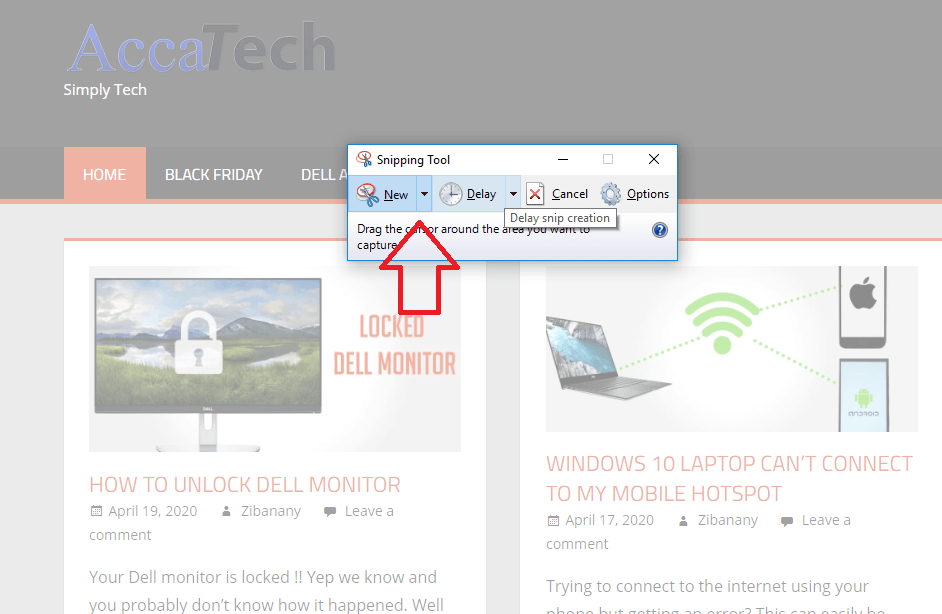
- Click on New.
- The screen will blur a bit, using you mouse select the area you want to save.
- If you make a mistake and highlight the wrong part its okay click new again and try again
Once satisfied with what you have captured, click on the save button or select File then save as. Then type the name you want it to be saved as.
Click save
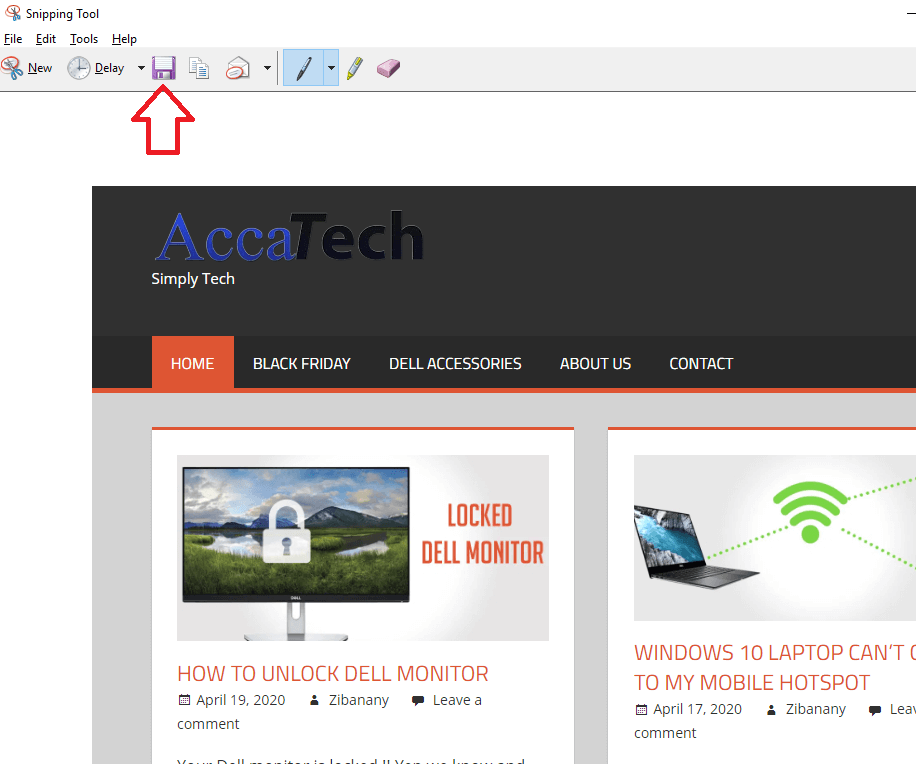
You can save your image in different formats like PNG, JPEG or BMP. If you don’t know what this is or means don’t worry just click the save button everything will be fine.
For other formats just click the down arrow just before you click save to select your preferred image format.
Take screenshot on a dell tablet
To take a screenshot on a dell table you use a combination of keys. Simultaneously press and hold the windows button and volume down button.
Note for this to work you have to press them at the same time. So you might not get it the first time, try a couple of times.
The screenshot is saved in the Pictures folder of your tablet
Take screenshot of open window in dell computer
In a scenario where you have multiple windows open and you want to take a screengrab of one of the windows not the whole screen. Its easy, you also use another combination of your keyboard keys.
The snipe tool would work but why hassle with the mouse when you can have the computer do it for you.
Click on the window you want to take a screenshot of to activate it.
Now Press Alt + PrtScr keys on your keyboard.
This will take a screen shot of the active window and save the image in the pictures folder.
Screenshot Dell desktop computer
We have been sharing the methods above referring to laptops.
What about desktop computers. You had be happy to know that almost all the above methods also work on desktop computers.
With the slight difference that on the desktop computer you are using an external keyboard. If you don’t have a keyboard for your desktop computer you can use the on screen keyboard.
It also works the same.
To access the onscreen keyboard , Press Start button and search for keyboard, then select on-screen keyboard.
Now you can do the keyboard combinations with the virtual keyboard.
Having troubles leave a comment below and we will respond to it promptly.
carry on, don’t stop.
Its very good content that guides me. Thank you so much for posting this one.
Your point of view caught my eye and was very interesting. Thanks. I have a question for you.
Thank you for your sharing. I am worried that I lack creative ideas. It is your article that makes me full of hope. Thank you. But, I have a question, can you help me?
Your article helped me a lot, is there any more related content? Thanks!
Thanks for sharing. I read many of your blog posts, cool, your blog is very good.
Your article helped me a lot, is there any more related content? Thanks!
Can you be more specific about the content of your article? After reading it, I still have some doubts. Hope you can help me.
Your point of view caught my eye and was very interesting. Thanks. I have a question for you.
Can you be more specific about the content of your article? After reading it, I still have some doubts. Hope you can help me.
Your article helped me a lot, is there any more related content? Thanks!
Your point of view caught my eye and was very interesting. Thanks. I have a question for you.
Your point of view caught my eye and was very interesting. Thanks. I have a question for you.
Can you be more specific about the content of your article? After reading it, I still have some doubts. Hope you can help me.
Your article helped me a lot, is there any more related content? Thanks!
Your point of view caught my eye and was very interesting. Thanks. I have a question for you.
Your article helped me a lot, is there any more related content? Thanks!
Can you be more specific about the content of your article? After reading it, I still have some doubts. Hope you can help me.
Your point of view caught my eye and was very interesting. Thanks. I have a question for you.
Your point of view caught my eye and was very interesting. Thanks. I have a question for you.
Your point of view caught my eye and was very interesting. Thanks. I have a question for you.
Thank you for your sharing. I am worried that I lack creative ideas. It is your article that makes me full of hope. Thank you. But, I have a question, can you help me?