
In a recent article I addressed how you can prevent data loss through frequent data backups. in this articles we will focus on the Dell backup and recovery basic tool. If you are using a Dell computer which came with windows 8, windows 8.1 or windows 10 you already have the application. Dell now ships their computers with Dell backup tool already installed and it does a fairly good job at backing up your files. Data loss happens frequently due to hardware failure, viruses sometimes simple because of human error. So to be safe always know how to backup your data and learn how to properly do it.
Installing Dell Backup and Recovery Basic
First remove the following backup applications if they are still installed on your computer, Dell Backup and Recovery Manager, Dell DataSafe Local, Dell Data Safe Online. If for whatever reason you had removed the Dell backup and recovery tool there is no reason to worry go ahead and get your free download from Dell and follow the instructions below on how to install.
- Run the setup file.
- Click Install
- Installshield wizard will start.
- Click Next, then install.
- After the installation is done, close all other applications and click finish to reboot.
Setting up Dell Backup and Recovery basic
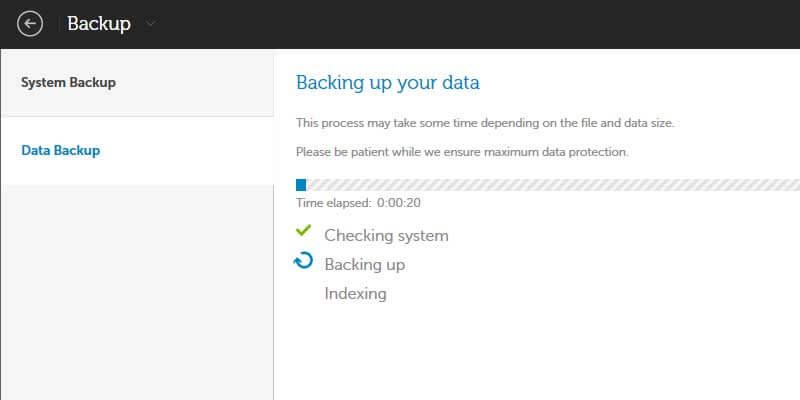
After rebooting, you can go ahead and launch the application. It will take a couple of minutes initalising depending on the speed of your computer. It took about a minute for me. Am using the Dell inspiron 3521 core i3 which is not that fast so it shouldn’t take long. When its done it will open a window like the one on the beginning of the article. Now you are ready to back up your data.
- Close open programs
- Click the backup tile.
- Under where, select were you want the backup to be saved
- On data backup Select Local (Dell has scrapped out the online data backup function).
- On data backup creation select the folders which you want back up.
By default, my documents, pictures and music folders are selected for backup. To add more files to the backup just click browse and you can tick on all the folders that you want the backup tool to include. When you click backup now, the program will take a snapshot of all the files and folders you have selected. You can use this backup to restore the files in case data has been corrupted or you have mistakenly deleted them. You can also learn about habits to prevent data loss.
Restore files from Dell backup
In the event that your files get corrupted, deleted or you just want to revert a certain file to how it was in an earlier stage you can use the backups you created.
Simply start the Dell backup and recovery panel
Click on the recovery tile.
There are three main sections here labeled: where, how and what.
Select the files or folders that you want to restore
Where
If you have one backup file leave that as it is. If you have had multiple backups locate the one from which you want to restore from. You will need to insert your flash drive or external hard drive if you had used an external device to save your backups.
How
Rename Duplicate files – This option keeps any files that may contain the same name. If there is a file with the same name in the destination folder the file from the backup will have a number added to it. This option is good if you want to compare the files yourself but it can be very time consuming especially if you are dealing with lots of file.
Keep newer files
With this option the using the time stamp will dictacte how the files are dealt with. Older files will be removed and replaced with files with newer time stamps.
Overwrite All
Proceed with caution on this one as you might unintentionally lose data. This option will overwrite and replace all the data with data from the backup.
Keep older files
All new files will be replaced with files and folders with older dates and time stamps.
What
Here you select the file, folder or folders you want restored
Review you selection if you are satisfied you can click
Restore now.
All your files will be back how they were when you last did your backup.
Thanks for the good writeup. It in reality was once a entertainment account
it. Look complex to far delivered agreeable from you!
By the way, how could we keep up a correspondence?
I constantly emailed this webpage post page to all my associates, as if like
to read it next my contacts will too.
I have read so many articles regarding the blogger lovers however this piece of
writing is actually a nice post, keep it up.
Can you be more specific about the content of your article? After reading it, I still have some doubts. Hope you can help me.
bookmarked!!, I like your blog!
Great items from you, man. I’ve consider your stuff prior to and you are simply too excellent.
I actually like what you’ve received here, certainly like what you are saying
and the way in which you say it. You’re making it enjoyable and you continue to care for to
keep it sensible. I can’t wait to learn far more from you.
This is actually a great site.
Your article helped me a lot, is there any more related content? Thanks!
Your point of view caught my eye and was very interesting. Thanks. I have a question for you.
Hi! I know this is kind of off topic but I was wondering if you knew where I could get a captcha plugin for my comment form?
I’m using the same blog platform as yours and I’m having problems finding one?
Thanks a lot!
Thank you for your sharing. I am worried that I lack creative ideas. It is your article that makes me full of hope. Thank you. But, I have a question, can you help me?
My brother suggested I might like this blog.
He was entirely right. This post truly made my day.
You can not imagine simply how much time I had spent for this information! Thanks!
My partner and I stumbled over here different page and
thought I might check things out. I like what I see so now i am following you.
Look forward to exploring your web page again.
Whats up this is kinda of off topic but I was wondering if
blogs use WYSIWYG editors or if you have to manually code
with HTML. I’m starting a blog soon but have no coding know-how so I
wanted to get guidance from someone with experience.
Any help would be enormously appreciated!
Currently it seems like Movable Type is the
top blogging platform available right now. (from what
I’ve read) Is that what you are using on your blog?
Wonderful, what a web site it is! This blog presents helpful information to us, keep it up.
Can I just say what a relief to uncover somebody who truly understands what they’re
discussing over the internet. You certainly understand how to bring an issue to light and make
it important. More people need to read this and understand this side of your story.
I can’t believe you are not more popular given that you certainly have the gift.
Admiring the dedication you put into your website and detailed information you offer.
It’s great to come across a blog every once in a while that isn’t the same unwanted rehashed information. Great read!
I’ve bookmarked your site and I’m including your RSS feeds to
my Google account.
Hello there! I could have sworn I’ve been to this website
before but after browsing through some of the post I realized it’s
new to me. Anyhow, I’m definitely glad I found it and I’ll be bookmarking and checking back frequently!
Its such as you read my mind! You appear to grasp so much about this, such as you
wrote the e-book in it or something. I think that you could
do with a few p.c. to drive the message home a little
bit, but other than that, this is magnificent blog.
An excellent read. I’ll definitely be back.
It started one random night when we were in bed after a shower.オナドール I commanded her to get on her knees face down, ass up ,and I started going down on her from behind.
It started one random night when we were in bed after a shower.オナドール I commanded her to get on her knees face down, ass up ,and I started going down on her from behind.
This is a topic that is close to my heart…
Best wishes! Where are your contact details though?
Quality articles is the key to be a focus for the users to go to
see the web site, that’s what this site is providing.
Nice blog! Is your theme custom made or did you download it from somewhere?
A theme like yours with a few simple tweeks would really make
my blog shine. Please let me know where you got your design. Thanks
In case you are looking for the gorgeous sex tablets in Pakistan, this description is supposed to be for you.
However, the pill could not essentially take away these feelings of stress & anxiety associated to a
sexual encounter.
Very good post. I am experiencing some of these issues as well..
Wow, superb blog layout! How long have you ever been blogging for?
you make blogging glance easy. The full look of your web
site is wonderful, as smartly as the content material!
Thank you for sharing your thoughts. I truly appreciate your efforts and I
will be waiting for your further post thank you once again.
It’s a shame you don’t have a donate button! I’d
definitely donate to this superb blog! I suppose for now i’ll settle for bookmarking and adding your RSS feed to my Google account.
I look forward to fresh updates and will share this website with my Facebook group.
Talk soon!
I’ve been surfing online more than 4 hours today, yet
I never found any interesting article like yours.
It’s pretty worth enough for me. In my view, if all web owners and bloggers made good content as you did, the internet will be much more useful than ever before.
If some one desires expert view regarding blogging after that i propose him/her
to pay a quick visit this weblog, Keep up the good job.
Very shortly this site will be famous among all blogging and site-building viewers, due to it’s nice articles
Thanks for sharing. I read many of your blog posts, cool, your blog is very good.
I was recommended this blog by my cousin. I’m not
sure whether this post is written by him as no one else know such detailed about
my difficulty. You are incredible! Thanks!
If you are going for most excellent contents like I do, only go to see this website all
the time because it gives quality contents, thanks
you are really a excellent webmaster. The site loading velocity is incredible.
It kind of feels that you’re doing any distinctive trick.
Moreover, The contents are masterwork. you’ve performed a fantastic activity in this subject!
Good day! I could have sworn I’ve been to your blog before but after going
through a few of the posts I realized it’s new to me. Regardless,
I’m definitely delighted I found it and I’ll be bookmarking it and checking back
regularly!
Outstanding post but I was wanting to know if you could
write a litte more on this subject? I’d be very grateful
if you could elaborate a little bit further. Thank you!
Every weekend i used to go to see this website, because i wish for enjoyment,
as this this web site conations in fact fastidious funny material
too.
I just like the helpful information you provide in your articles.
I’ll bookmark your blog and check once more here frequently.
I am somewhat certain I’ll be told many new stuff right here!
Best of luck for the following!
Thanks for sharing your thoughts on online educational learning.
Regards
Amazing issues here. I’m very satisfied to see your post.
Thank you so much and I am having a look forward to touch you.
Will you kindly drop me a mail?
Hello there, You have done a fantastic job. I’ll certainly digg it and personally suggest to my
friends. I am confident they will be benefited
from this site.
You should take part in a contest for one of the highest quality
blogs on the net. I will highly recommend this site!
An outstanding share! I’ve just forwarded this onto a coworker who had been conducting a little research on this.
And he actually ordered me lunch simply because I discovered it for him…
lol. So let me reword this…. Thank YOU for the meal!!
But yeah, thanx for spending the time to talk about this topic here on your
blog.
Greetings! Very useful advice in this particular post!
It’s the little changes that make the most important
changes. Thanks a lot for sharing!
First off I want to say great blog! I had a quick question that
I’d like to ask if you do not mind. I was interested to find out how you center yourself
and clear your head before writing. I have had a hard time clearing my thoughts in getting my thoughts out.
I do enjoy writing but it just seems like the first 10 to 15 minutes
are wasted just trying to figure out how to begin. Any suggestions or hints?
Many thanks!
You actually make it seem so easy with your presentation but I find this topic
to be really something that I think I would never understand.
It seems too complex and very broad for me. I’m looking forward for
your next post, I will try to get the hang of it!
Thanks for sharing your thoughts on bravo poker waiting list.
Regards
Undeniably believe that which you said. Your favorite reason seemed to be on the net the simplest thing to be aware of.
I say to you, I definitely get irked while people think
about worries that they just don’t know about. You managed to hit
the nail upon the top and also defined out
the whole thing without having side effect , people could take a signal.
Will probably be back to get more. Thanks
Howdy! I could have sworn I’ve been to this website before but
after browsing through some of the post I realized it’s new to
me. Anyhow, I’m definitely glad I found it and I’ll be bookmarking and checking back often!
Hello! I just wanted to ask if you ever have
any problems with hackers? My last blog (wordpress) was hacked and I
ended up losing many months of hard work due to no
backup. Do you have any methods to stop hackers?
Wow, this paragraph is fastidious, my sister is analyzing such things, thus
I am going to inform her.
Hello, this weekend is fastidious for me, for the reason that this moment i am reading this impressive educational piece
of writing here at my home.
I am regular visitor, how are you everybody? This paragraph posted at this site is genuinely fastidious.
whoah this blog is fantastic i like studying your articles.
Keep up the great work! You know, a lot of people are searching round for this info, you could aid them greatly.
I was wondering if you ever thought of changing the structure of your
blog? Its very well written; I love what youve got to say.
But maybe you could a little more in the way of content so people could connect with
it better. Youve got an awful lot of text for only having one or two
pictures. Maybe you could space it out better?
Awesome issues here. I am very glad to peer your article.
Thank you so much and I’m having a look forward to contact you.
Will you kindly drop me a e-mail?
Greetings! Very helpful advice in this particular
post! It’s the little changes that produce the most significant changes.
Many thanks for sharing!
I blog frequently and I genuinely appreciate your information.
The article has truly peaked my interest. I am going to book mark your
website and keep checking for new details about once a week.
I opted in for your Feed too.
Hi there, the whole thing is going perfectly here and ofcourse every one is sharing information, that’s in fact good,
keep up writing.
I know this if off topic but I’m looking into starting my own weblog and
was wondering what all is required to get setup? I’m assuming having a
blog like yours would cost a pretty penny? I’m not very web
smart so I’m not 100% sure. Any recommendations or
advice would be greatly appreciated. Appreciate it
Write more, thats all I have to say. Literally, it seems as
though you relied on the video to make your point.
You obviously know what youre talking about, why
throw away your intelligence on just posting
videos to your weblog when you could be giving us something informative to read?
Saved as a favorite, I really like your web site!
I think this is among the most significant info for me. And i’m glad
reading your article. But wanna remark on few general things, The web site style is ideal, the articles is really excellent : D.
Good job, cheers
You’ve made some decent points there. I checked
on the web to find out more about the issue and found most people will go along with your views on this website.
If you are going for finest contents like me, only pay
a quick visit this web page every day for the reason that it offers feature contents, thanks
I enjoy, result in I discovered just what I was having a look for.
You have ended my 4 day lengthy hunt! God Bless you man. Have a great
day. Bye
A motivating discussion is worth comment. There’s no doubt
that that you ought to write more about this subject matter,
it might not be a taboo subject but usually folks don’t
discuss such issues. To the next! Many thanks!!
At this time it looks like Drupal is the preferred blogging platform out there right
now. (from what I’ve read) Is that what you’re using on your blog?
I loved as much as you will receive carried out right here.
The sketch is attractive, your authored subject matter stylish.
nonetheless, you command get bought an impatience over that you wish be delivering the following.
unwell unquestionably come further formerly again since exactly the same nearly very often inside case you shield
this increase.
Thank you for the auspicious writeup. It actually was
once a amusement account it. Look advanced to far introduced agreeable from you!
However, how can we keep up a correspondence?
Since the admin of this web site is working, no uncertainty very shortly it will be well-known, due to its feature contents.
It is not my first time to go to see this web site, i am visiting this web page dailly and get good information from here all the time.
I am sure this paragraph has touched all the internet viewers,
its really really pleasant paragraph on building up new weblog.
Hi to every , as I am in fact keen of reading this webpage’s post to be updated
regularly. It includes nice material.
First of all I want to say fantastic blog! I had a quick question which I’d like to
ask if you do not mind. I was interested to find
out how you center yourself and clear your head before writing.
I have had trouble clearing my thoughts in getting my ideas out there.
I do take pleasure in writing however it just seems like the first 10 to
15 minutes are lost just trying to figure out how to begin. Any suggestions or hints?
Appreciate it!
We absolutely love your blog and find many of your post’s to be
exactly what I’m looking for. Does one offer guest writers to
write content for you personally? I wouldn’t
mind producing a post or elaborating on most of the subjects you write concerning here.
Again, awesome site!
Hi there! Someone in my Facebook group shared this website with us so I came to check it out.
I’m definitely enjoying the information. I’m book-marking and will be tweeting this to my followers!
Terrific blog and superb design.
We stumbled over here different web page and thought I might
as well check things out. I like what I see so now i’m following
you. Look forward to checking out your web page for a second time.
Saved as a favorite, I really like your web site!
Appreciate this post. Will try it out.
I like what you guys tend to be up too. Such clever work and reporting!
Keep up the superb works guys I’ve incorporated you guys to my own blogroll.
Deforestation in the Amazon region remains a significant challenge,and the COVID-19 pandemic has had a major impact on efforts to address the issue.女性 用 ラブドール
Magnificent goods from you, man. I have keep in mind your stuff prior to
and you’re simply extremely magnificent. I really
like what you have obtained here, certainly like what you’re
stating and the way through which you assert it.
You’re making it enjoyable and you continue to care for to stay it smart.
I cant wait to learn far more from you. That is actually a terrific web
site.
Hi I am so grateful I found your webpage, I really found you by mistake,
while I was researching on Digg for something else, Anyhow I
am here now and would just like to say kudos for a incredible post and a all round enjoyable
blog (I also love the theme/design), I don’t have time to go through it all at the moment but I have
bookmarked it and also added your RSS feeds, so when I have time I will be
back to read more, Please do keep up the fantastic work.
My relatives always say that I am wasting my time here at web, except I know I am getting knowledge all the time by reading such pleasant articles or reviews.
Hi, yeah this piece of writing is actually pleasant and I have learned lot of things from
it about blogging. thanks.
Hello, just wanted to say, I loved this blog post. It
was inspiring. Keep on posting!
Hello, I believe your web site might be having internet browser compatibility issues.
Whenever I take a look at your web site in Safari,
it looks fine however, when opening in Internet Explorer, it has some overlapping issues.
I simply wanted to give you a quick heads up! Other than that, excellent site!
I’m gone to say to my little brother, that he should also visit this weblog on regular basis to obtain updated from latest news
update.
Your style is so unique compared to other folks I’ve read stuff
from. Many thanks for posting when you’ve got the opportunity, Guess I will just book mark this blog.
Excellent, what a weblog it is! This website provides useful
information to us, keep it up.
What’s up, this weekend is nice designed for me, as this point in time i am reading this fantastic educational article here at my residence.
Now I am going away to do my breakfast, after having my
breakfast coming again to read additional news.
Great post. I was checking continuously this blog and I’m impressed!
Extremely helpful information specially the last part 🙂
I care for such information a lot. I was seeking this particular information for a long
time. Thank you and best of luck.
Wow that was odd. I just wrote an really long comment but after I clicked submit my comment
didn’t appear. Grrrr… well I’m not writing all that over again. Anyway, just
wanted to say excellent blog!
Excellent, what a weblog it is! This weblog gives helpful information to us, keep it up.
Everyone loves what you guys are up too. This
sort of clever work and reporting! Keep up the excellent works guys I’ve added you guys to my
own blogroll.
Thanks to my father who informed me about this
weblog, this web site is actually awesome.
With havin so much content do you ever run into any problems of plagorism or
copyright infringement? My site has a lot of completely unique content I’ve either authored myself
or outsourced but it looks like a lot of it is popping it up all over the
internet without my authorization. Do you know any ways to
help stop content from being ripped off? I’d certainly appreciate it.
This article will assist the internet viewers for setting up new web site or even a weblog from
start to end.
Hello my family member! I want to say that this article is amazing, great written and come with almost all vital
infos. I’d like to see extra posts like this .
Ahaa, its nice conversation about this post here at this blog, I
have read all that, so at this time me also commenting at this place.
I love it when people get together and share views.
Great blog, continue the good work!
If some one wishes expert view concerning blogging then i recommend him/her to go to see this website,
Keep up the pleasant job.
I want to to thank you for this excellent read!!
I absolutely enjoyed every little bit of it. I have you
bookmarked to look at new things you post…
WOW just what I was searching for. Came here by searching for Ocean conservation
This is the right site for everyone who wants to understand this topic.
You know so much its almost hard to argue with you (not that I really will need to…HaHa).
You certainly put a fresh spin on a topic that’s been discussed for many years.
Wonderful stuff, just excellent!
Very good post. I am facing many of these issues as well..
I get pleasure from, cause I found exactly what I
used to be having a look for. You have ended my 4
day long hunt! God Bless you man. Have a great day.
Bye
An impressive share! I’ve just forwarded this onto a friend who had been conducting a little homework
on this. And he in fact ordered me dinner because I found it
for him… lol. So allow me to reword this…. Thank YOU for the meal!!
But yeah, thanx for spending the time to discuss this
issue here on your blog.
Hi to all, for the reason that I am really
keen of reading this web site’s post to be updated daily.
It carries good data.
Very nice post. I certainly appreciate this website. Thanks!
Thank you for your sharing. I am worried that I lack creative ideas. It is your article that makes me full of hope. Thank you. But, I have a question, can you help me?
At this moment I am going away to do my breakfast, later than having my breakfast coming over again to read more news.
Thank you for your sharing. I am worried that I lack creative ideas. It is your article that makes me full of hope. Thank you. But, I have a question, can you help me?
Do you have a spam problem on this site; I also am a blogger, and I was wanting
to know your situation; many of us have developed some
nice practices and we are looking to trade methods with others, be sure to shoot me an email if interested.
In addition,女性 用 ラブドールthe construction of sets and the materials used in production can also have an impact on the environment.
such as agricultural waste and municipal waste,女性 用 ラブドールthere is a limit to how much can be sustainably produced.
女性 用 ラブドールIt is important to ensure that the production of SAF does not compete with food production or lead to deforestation or other negative environmental impacts.Despite these challenges,
Hello there! This is my first comment here so I just wanted
to give a quick shout out and say I truly enjoy reading through your articles.
Can you recommend any other blogs/websites/forums that go over the same topics?
Thanks for your time!
VE
YN
Hello very cool site!! Man .. Beautiful .. Amazing .. I will bookmark your web site and
take the feeds also? I am satisfied to search out a lot of helpful information here in the submit, we’d like develop
extra techniques in this regard, thank you for sharing. . .
. . .
want to fuck me now? free sex now
OJ
MQ
HW
This is my first time pay a visit at here and i am really
happy to read all at single place.
I love what you guys are usually up too. This sort of clever
work and exposure! Keep up the awesome works guys I’ve incorporated you guys to our blogroll.
GMO Gaika Reputation – Pros, Cons, and the Truth About Withdrawal Refusals
GMO Gaika is widely used by both beginners and experienced FX traders. Its popularity stems from easy-to-use trading tools, stable spreads, and a high level of trust due to its operation by a major Japanese company. Many users feel secure thanks to this strong domestic backing.
On the other hand, there are some online rumors about “withdrawal refusals,” but in most cases, these are due to violations of terms or incomplete identity verification. GMO Gaika’s transparent response to such issues suggests that serious problems are not a frequent occurrence.
You can find more detailed insights into the pros and cons of GMO Gaika, as well as real user experiences, on the trusted investment site naughty-cao.jp. If you’re considering opening an account, it’s a good idea to review this information beforehand.
I was wondering if you ever thought of changing the layout of your website?
Its very well written; I love what youve got to say.
But maybe you could a little more in the way of content so people could connect with it better.
Youve got an awful lot of text for only having
1 or 2 images. Maybe you could space it out better?
Электрокарниз — это идеальное решение для вашего дома, которое позволяет легко управлять шторами с помощью пульта.
Электрокарниз — это современное решение для автоматизации управления шторами и занавесками.
Рулонные шторы с электроприводом — это идеальное решение для создания уюта и комфорта в вашем доме, позволяющее управлять светом и приватностью с помощью простого нажатия кнопки.
Рулонные шторы с электроприводом завоевывают популярность среди покупателей. Эти изделия представляют собой современное решение для оформления окон. Их удобство и функциональность выгодно отличают их от традиционных моделей.
Главное преимущество – это возможность управления ими при помощи пульта. Такое управление обеспечивает комфорт и простоту в использовании. Электропривод позволяет задать расписание открытия и закрытия штор.
Монтаж рулонных штор с электроприводом осуществляется достаточно быстро. Вам потребуется минимальный набор инструментов и немного времени. Разнообразие материалов и дизайна позволяет выбрать подходящие шторы для любого стиля.
Рулонные шторы с электроприводом гарантируют защиту от солнечного света и обеспечивают стиль. Разнообразие тканей позволяет контролировать степень затемнения. Это позволяет создавать уютную атмосферу в вашем доме.
Рулонные шторы с электроприводом — это идеальное решение для создания уюта и комфорта в вашем доме, позволяющее управлять светом и приватностью с помощью простого нажатия кнопки.
Рулонные шторы с электроприводом завоевывают популярность среди покупателей. Данные шторы являются высокотехнологичным вариантом для оформления интерьера. Их удобство и функциональность выгодно отличают их от традиционных моделей.
Одним из главных преимуществ является возможность управления шторами с помощью пульта. Это позволяет легко регулировать уровень освещения в помещении. Электропривод позволяет задать расписание открытия и закрытия штор.
Установка рулонных штор с электроприводом проходит без особых трудностей. Необходимо всего лишь несколько инструментов и немного терпения. Выбор из множества дизайнов и материалов дает возможность подобрать идеальный вариант для любого стиля.
Рулонные шторы с электроприводом обеспечивают не только стильный вид, но и защиту от солнца. С помощью различных тканей можно регулировать уровень затемнения. Таким образом, вы сможете создать комфортные условия в вашем жилище.
Электрокарниз — это идеальное решение для вашего дома, которое позволяет легко управлять шторами с помощью пульта.
Также необходимо определить, какие шторы вы планируете использовать.
The aviation industry has been under increasing pressure to reduce its carbon footprint,女性 用 ラブドールand sustainable aviation fuel (SAF) has emerged as a promising solution.
sturdiness that surpasses conventional TPE (Thermo-Plastic Elastomer).
Can you be more specific about the content of your article? After reading it, I still have some doubts. Hope you can help me.
and tapirs.女性 用 ラブドールVisitors can stay in sustainable lodges,
HX
Thank you for the good writeup. It in fact was a amusement account it.
Look advanced to far added agreeable from you!
By the way, how can we communicate?
You really make it seem really easy with your presentation however I
to find this topic to be really one thing that I think I’d by
no means understand. It sort of feels too complex and very large for
me. I’m looking forward for your next post, I will try to
get the hold of it!
There is certainly a lot to know about this
topic. I really like all of the points you have made.
Hello there! This article couldn’t be written any better! Looking at this article reminds me of my previous
roommate! He continually kept talking about this. I am going to send this information to him.
Fairly certain he will have a good read. I appreciate you for
sharing!
Link exchange is nothing else except it is only placing the other person’s blog link on your page at suitable place and other
person will also do similar in support of you.
This post is worth everyone’s attention. Where can I find out more?
Hmm is anyone else encountering problems with the images on this blog loading?
I’m trying to determine if its a problem on my end
or if it’s the blog. Any feed-back would be greatly appreciated.
Thank you for some other magnificent article. Where else could anybody get that kind of
information in such an ideal method of writing?
I have a presentation subsequent week, and I’m at the look for such
information.
What’s Taking place i am new to this, I stumbled upon this I’ve discovered It absolutely helpful and it has
helped me out loads. I’m hoping to give a contribution &
help other customers like its helped me. Great job.
These are really great ideas in regarding blogging.
You have touched some pleasant things here. Any way keep up wrinting.
I was wondering if you ever considered changing the
structure of your site? Its very well written; I love what youve
got to say. But maybe you could a little more in the way of content so people
could connect with it better. Youve got an awful
lot of text for only having 1 or 2 images. Maybe you could space
it out better?
Great website. Plenty of useful information here. I am sending it to some
friends ans additionally sharing in delicious. And certainly,
thanks on your sweat!
Hey there! This is my first comment here so I just wanted to give a quick shout out and tell you I really enjoy reading through your blog posts.
Can you recommend any other blogs/websites/forums that deal with the same subjects?
Thanks a lot!
I am really impressed with your writing abilities as smartly as with the layout
to your blog. Is that this a paid subject or did you modify it yourself?
Anyway stay up the nice high quality writing, it is rare to peer a nice blog like this one today..
Great items from you, man. I’ve consider your stuff prior
to and you’re simply too excellent. I really like what you’ve acquired right here, really like what you are
stating and the way in which through which you say it.
You make it entertaining and you still care for to stay it smart.
I can’t wait to learn much more from you. This is
really a wonderful site.
Keep this going please, great job!
I was suggested this web site by my cousin. I am not sure whether this post is written by him as nobody else know such detailed about my difficulty.
You are incredible! Thanks!
Yes! Finally something about Read it.
This blog was… how do I say it? Relevant!! Finally I’ve found something that helped
me. Cheers!
Appreciate the recommendation. Will try it out.
Do you have a spam problem on this site; I also am a blogger,
and I was wanting to know your situation; many of us have created some nice methods and we are
looking to trade solutions with other folks, why not shoot
me an email if interested.
Terrific work! That is the type of info that should be
shared across the net. Disgrace on Google for not positioning this post upper!
Come on over and visit my website . Thanks =)
I just couldn’t go away your web site prior to suggesting that
I really loved the usual information a person supply on your guests?
Is gonna be again ceaselessly to check out new posts
I was recommended this web site by my cousin. I am not positive whether or not this publish is written by way of him as no one else realize such distinct about my trouble.
You are wonderful! Thanks!
We absolutely love your blog and find the majority of your post’s to
be just what I’m looking for. Does one offer guest writers
to write content for you personally? I wouldn’t mind writing
a post or elaborating on a few of the subjects you write with regards to here.
Again, awesome site!
Great post.
naturally like your web-site however you need to take a look at the spelling on several of
your posts. Several of them are rife with spelling problems
and I find it very bothersome to tell the truth nevertheless I’ll surely come
back again.
Quality posts is the key to invite the people to visit the site, that’s what this web page is providing.
I don’t even understand how I finished up here, however
I believed this post used to be good. I don’t know
who you might be but definitely you are going to a well-known blogger should
you are not already. Cheers!
This is a really good tip especially to those fresh to the blogosphere.
Short but very precise info… Thank you for sharing this one.
A must read post!
Quality articles is the secret to invite the people to pay a visit the web page, that’s what this
site is providing.
My brother suggested I might like this web site. He was
entirely right. This post actually made my day. You can not imagine
just how much time I had spent for this info!
Thanks!
It’s nearly impossible to find experienced people on this subject, however, you
seem like you know what you’re talking about! Thanks
I have been browsing on-line more than three hours these days, but I never found any attention-grabbing article like yours.
It is beautiful value enough for me. Personally, if all website owners and bloggers made just right content material as you
did, the internet might be a lot more useful than ever before.
What’s Happening i am new to this, I stumbled upon this I’ve discovered It absolutely useful and it has aided
me out loads. I am hoping to contribute & help other customers like its aided
me. Great job.
If you would like to improve your know-how simply
keep visiting this website and be updated with the most recent news update posted here.
This paragraph will help the internet visitors for building up new blog or even a blog
from start to end.
That is very interesting, You’re a very skilled blogger.
I’ve joined your rss feed and stay up for looking for more of your great post.
Also, I’ve shared your website in my social networks
I really like it when folks get together and share ideas.
Great website, keep it up!
I am sure this piece of writing has touched all the internet users, its really really fastidious paragraph on building up new webpage.
Useful info. Lucky me I discovered your site
by accident, and I’m shocked why this coincidence did not happened earlier!
I bookmarked it.
Why people still make use of to read news papers when in this
technological world all is available on web?
We’re a group of volunteers and opening a new scheme in our community.
Your site offered us with valuable info to work on. You have done an impressive job and our whole community
will be grateful to you.
Hurrah! Finally I got a website from where I be able to really take valuable facts regarding my study and knowledge.
I go to see every day a few web pages and
websites to read posts, except this blog provides feature based
posts.
Hello, I log on to your new stuff regularly.
Your writing style is awesome, keep doing what you’re doing!
Hi, its pleasant paragraph concerning media print, we all
be familiar with media is a great source of data.
I have been exploring for a little bit for any
high quality articles or weblog posts on this sort
of area . Exploring in Yahoo I ultimately stumbled upon this website.
Reading this information So i am happy to exhibit that I’ve a
very good uncanny feeling I came upon just what I needed.
I so much undoubtedly will make certain to do not omit this web site and give it a look on a relentless basis.
I got this web page from my pal who shared with me about this site and now
this time I am browsing this website and reading very informative content at this time.
Pretty! This has been an incredibly wonderful post. Thank you for providing these details.
Hello there, You have done a great job. I will certainly digg it and personally recommend to my friends.
I am sure they’ll be benefited from this website.
There is definately a lot to know about this issue.
I love all the points you have made.
Great information. Lucky me I came across your site by
chance (stumbleupon). I’ve bookmarked it for later!
I like the valuable information you provide for your articles.
I’ll bookmark your weblog and test again right here frequently.
I am relatively sure I will be informed many new stuff proper here!
Good luck for the next!
Amazing! Its actually remarkable article, I have got much clear idea regarding from this
post.
Hello there, I found your website by means of Google whilst looking for a similar subject, your website
got here up, it seems good. I’ve bookmarked it in my google bookmarks.
Hello there, simply was alert to your blog through Google, and
located that it’s really informative. I am gonna watch out for brussels.
I will be grateful when you continue this in future. Lots of
other folks might be benefited from your writing.
Cheers!
I love your blog.. very nice colors & theme. Did you make this website yourself
or did you hire someone to do it for you? Plz answer back as I’m looking to create my own blog
and would like to know where u got this from.
appreciate it
Today, I went to the beach with my children. I found a sea shell
and gave it to my 4 year old daughter and said “You can hear the ocean if you put this to your ear.” She placed the shell to her ear and screamed.
There was a hermit crab inside and it pinched her ear.
She never wants to go back! LoL I know this is totally off
topic but I had to tell someone!
I am not sure where you’re getting your information, but great topic.
I needs to spend some time learning more or understanding more.
Thanks for excellent information I was looking for this information for
my mission.
Do you mind if I quote a few of your articles as long as
I provide credit and sources back to your weblog?
My website is in the exact same niche as yours and my users would really benefit from a lot of the information you provide here.
Please let me know if this alright with you. Regards!
Thanks for sharing. I read many of your blog posts, cool, your blog is very good.
POPOSOAP creates easy-to-use, attractive, and solar-powered water solutions designed to enhance almost any outdoor space.
Their solar-powered bird bath fountains, solar water pumps,
and pond accessories run entirely on sunlight, making them effortless to use and low-maintenance.
Each unit activates instantly under the sun, providing gentle water
circulation that attracts birds, keeps water cleaner, and keeps water fresh for nearby wildlife.
Poposoap’s filter and pump combos help maintain clean water for
koi and plants, while their water feature pumps and solar pond lighting add flow, sparkle, and beauty to gardens in any season. Built
for durability and convenience, Poposoap’s solar-powered designs offer
a peaceful upgrade to any pond, without wiring, electricity costs, or technical installation.
Traneasily.com 提供精準的工具,協助用戶翻譯各種文字內容。平台為全球與華語使用者打造,提供好上手的易翻譯體驗。無論你需要可靠的線上翻譯工具或多語言支援,此平台都能呈現清晰自然的翻譯結果。以速度、易用性與準確度為核心,Traneasily 讓日常、商務、旅遊、學習等情境中的跨語溝通變得輕鬆又自信。
Naili’s conveyor technology helps warehouses operate more efficiently.
Their truck loading conveyors and unloading solutions
reduce labor effort and enhance productivity across distribution operations.
DM
CM
Really good info here, cheers.
Thanks for sharing. I read many of your blog posts, cool, your blog is very good.
I read this paragraph fully on the topic of the comparison of latest
and previous technologies, it’s awesome article.
Undeniably believe that that you stated.
Your favourite justification seemed to be on the net the easiest thing to
be aware of. I say to you, I definitely get irked at the same time
as other folks consider worries that they just do not know about.
You managed to hit the nail upon the highest
as neatly as outlined out the entire thing without
having side effect , people could take a signal. Will probably
be back to get more. Thanks
Современные буровые насосы созданы для эффективной прокачки
буровых растворов при строительстве нефтяных и газовых скважин.
Их конструкция снижает вибрации, увеличивает ресурс
работы и делает процесс бурения более
стабильным и безопасным.
With PexelDance, anyone can create studio-quality visuals using AI.
The platform combines image generation, video production, voice acting, and character animation in one place.
It’s designed for users who want to produce modern, eye-catching content quickly and without technical
barriers.
Hi there to every , for the reason that I am actually keen of reading this webpage’s post to be
updated daily. It contains nice data.
对于追求速度与安全并重的用户来说,快连加速器是一个值得尝试的选择。快连VPN采用多重防护机制,确保网络连接过程更加安全可靠,同时改善访问速度与稳定性。整体设计简洁实用,无需复杂设置即可连接。通过快连下载安装后,即可体验高效的网络加速服务。
使用有道翻译可以轻松解决语言障碍,支持多国语言互译和文档翻译,满足学习、办公和日常交流需求。软件运行流畅,占用资源低,使用便捷。用户可通过有道翻译下载快速安装,体验智能翻译服务,并在有道翻译官网获取最新更新和使用指南,提升跨语言沟通效率。
As a leading Office Furniture Manufacturer, Koorbiir specializes in designing
best ergonomic office chairs and ergonomic desks with chairs.
Our training chair manufacturer expertise ensures
that every branch ergonomic chair and staff chair provides
durability, style, and superior comfort for
daily use.
Hi there! Quick question that’s completely off topic.
Do you know how to make your site mobile friendly? My site looks weird when viewing from my iphone.
I’m trying to find a template or plugin that might be able
to fix this problem. If you have any recommendations, please share.
Cheers!
Hey there! I could have sworn I’ve been to this site before but after browsing through some of the post I realized it’s new to me.
Anyhow, I’m definitely happy I found it and I’ll be book-marking
and checking back often!
Very soon this site will be famous amid all blogging and site-building visitors, due to it’s fastidious posts
Good way of telling, and good article to obtain information about my presentation focus, which i
am going to convey in university.
Thanks for finally writing about > Dell backup and recovery basic, the easy way
to backup and restore your data. – Tech Info & Reviews < Loved it!
You ought to be a part of a contest for one of the best blogs on the web.
I am going to highly recommend this website!
Have you ever thought about creating an ebook or guest authoring on other websites?
I have a blog centered on the same ideas you
discuss and would love to have you share some stories/information. I know my subscribers
would value your work. If you’re even remotely interested, feel free to send me
an e-mail.
This design is spectacular! You certainly know how to keep a reader
entertained. Between your wit and your videos, I was almost moved to start my own blog (well, almost…HaHa!) Fantastic job.
I really loved what you had to say, and more than that, how you presented it.
Too cool!
Hey I know this is off topic but I was wondering if you knew
of any widgets I could add to my blog that automatically tweet my newest twitter
updates. I’ve been looking for a plug-in like this for quite
some time and was hoping maybe you would have some experience with something like this.
Please let me know if you run into anything. I truly enjoy reading your blog and I
look forward to your new updates.
I need to to thank you for this great read!! I definitely enjoyed every bit of it.
I have you bookmarked to check out new stuff you post…
Do you have a spam problem on this site; I also am a blogger, and I
was curious about your situation; we have developed some nice procedures
and we are looking to exchange methods with others, please shoot me an email if interested.
Undeniably consider that which you said. Your favourite justification seemed to be on the internet the simplest factor to remember of.
I say to you, I certainly get irked while folks
think about concerns that they plainly do not realize about.
You controlled to hit the nail upon the top and outlined out the
entire thing without having side-effects , other folks can take a signal.
Will probably be back to get more. Thanks
Hi there, just became aware of your blog through Google,
and found that it’s really informative. I am going to watch out for brussels.
I’ll be grateful if you continue this in future. Lots of people will be benefited from your writing.
Cheers!
JOKOTOTO terus dikenal sebagai salah satu platform hiburan digital yang menawarkan permainan lengkap, sistem yang stabil, serta layanan responsif untuk para pemain di
berbagai wilayah.
Tesiatoto hadir dengan pasaran angka yang variatif dan hasil keluaran yang
cepat, menjadikannya pilihan favorit bagi pemain yang membutuhkan keakuratan dan kecepatan dalam bermain.
TikTakTogel menawarkan pengalaman bermain yang lebih modern, dengan fitur yang mudah dipahami pemula namun tetap memberikan peluang kemenangan yang besar untuk pemain berpengalaman.
IndraTogel memberikan kenyamanan melalui tampilan ringan dan proses transaksi
yang cepat, sehingga aktivitas bermain dapat dilakukan tanpa hambatan kapan saja.
Bento4D semakin naik daun berkat bonus menarik, variasi permainan yang lengkap, serta dukungan pelanggan yang aktif selama 24 jam penuh.
Rostot dikenal karena stabilitas sistemnya serta pasaran resmi yang selalu diperbarui tepat waktu, membuat pemain lebih percaya dalam memilih angka
dan strategi.
CapsaToto menambah deretan platform unggulan dengan fitur
keamanan ketat, permainan modern, dan promo menarik yang membuat aktivitas bermain semakin menyenangkan dan menguntungkan.
Когда произойдет ДТП, крайне важно действовать быстро и правильно,
чтобы уменьшить последствия и гарантировать безопасность всех участников.
Вот список ключевых действий, которые нужно выполнить.
Оцените ситуацию
Первым делом остановитесь и проанализируйте обстановку.
Проверьте, что вы и остальные участники инцидента находитесь в безопасности.
Если кто-то пострадал, немедленно вызовите скорую помощь.
Вызовите ГИБДД
Как только вы разобрались с ситуацией, необходимо вызвать ГИБДД.
Полиция дорожного движения оформит инцидент
и поможет вам с документами.
Гарантируйте безопасность на месте происшествия
Если это нужно, установите знак аварийной остановки.
Если есть возможность, переместите машины на
обочину, чтобы избежать повторных столкновений.
Hello terrific blog! Does running a blog such as this take a lot of work?
I’ve virtually no expertise in coding however I was hoping to start my own blog soon. Anyhow, if you have any recommendations or tips for new blog owners please share.
I know this is off topic however I simply wanted to ask.
Cheers!
This article provides clear idea designed for the new viewers of blogging, that truly how to do running a blog.
I like the helpful information you provide in your
articles. I will bookmark your blog and check again here regularly.
I am quite certain I will learn many new stuff right here!
Good luck for the next!
These are in fact great ideas in about blogging.
You have touched some fastidious things here. Any way keep up wrinting.
Great beat ! I would like to apprentice while you amend your web site, how could i subscribe for a
blog web site? The account aided me a acceptable
deal. I were a little bit familiar of this your broadcast offered bright transparent idea
Amazing! This blog looks exactly like my old one!
It’s on a entirely different topic but it has pretty much the same layout
and design. Great choice of colors!
Dewatogel aɗalah
hasіl result togel terpercaya
untuk pasɑran HK, SGP, Sydney, dan lainnya.
Dapatkan սpdate yang selalu tepat waktu
hanya di Dewatogel link.
I enjoyed reading this. It’s clear and well-written.
Hey there! I’ve been reading your bloog for a long time now andd
finally got the bravery to go ahead and give yyou a shout out from Dalas Tx!
Just wanted to mention keep up the excellent job!
Не следует умалять значение
квалифицированной помощи.
Ошибки могут продлить процесс
и уменьшить вероятность успешного завершения дела.
Таким образом, в случае возникновения таких ситуаций желательно связаться с адвокатом как можно быстрее.
Процесс восстановления квартиры после затопления может быть долгим
и сложным, но с помощью опытного юриста вы
сможете существенно упростить его.
Не забывайте, что защита своих прав — это не только юридическая формальность, но и возможность восстановить комфорт и безопасность в вашем доме.
Если вы столкнулись с проблемами, связанными с заливом квартиры, не
стесняйтесь обращаться за помощью.
Уверенность в будущем и комфорт вашего проживания имеют большое значение.
Запланируйте консультацию уже сегодня
и начните движение к восстановлению своего имущества.
Мы можем восстановить справедливость,
и готовы поддержать вас в этом пути.
Мы обещаем полное сопровождение вашего
дела, от подготовки необходимой документации до защиты
ваших интересов в суде.
Поручите свои заботы профессионалам и смотрите,
как всё начнёт меняться к лучшему.
Когда произойдет ДТП, крайне
важно действовать быстро
и правильно, чтобы уменьшить последствия и гарантировать безопасность всех участников.
Предлагаем основные шаги, которые стоит предпринять.
Оцените ситуацию
В первую очередь, остановитесь и оцените обстоятельства.
Убедитесь, что вы и другие участники аварии находитесь в безопасности.
При наличии пострадавших срочно вызовите
скорую помощь.
Обязательно позвоните в ГИБДД
Как только вы разобрались с ситуацией, необходимо вызвать ГИБДД.
Сотрудники ГИБДД зафиксируют произошедшее и окажут помощь
в оформлении необходимых документов.
Обеспечьте безопасность места происшествия
При необходимости поставьте знак аварийной остановки.
Если есть возможность, переместите машины
на обочину, чтобы избежать повторных столкновений.
Great posts Cheers!
I’m now not sure where you’re getting your info, however great topic. I needs to spend a while studying more or figuring out more. Thanks for excellent information I used to be looking for this information for my mission.
I am not sure where you’re getting your info, but great topic. I must spend a while finding out much more or understanding more. Thank you for magnificent information I was in search of this information for my mission.
I am no longer sure where you are getting your info, however great topic. I must spend some time finding out more or figuring out more. Thank you for fantastic information I used to be looking for this info for my mission.
I am no longer positive where you are getting your information, but good topic. I needs to spend a while finding out more or figuring out more. Thank you for magnificent information I used to be in search of this information for my mission.
Greetings! I’ve been following your web site for a while now and finally got the courage to go ahead and give you a shout out from Kingwood Tx! Just wanted to tell you keep up the excellent work!
Hi, I check your blog on a regular basis. Your story-telling style is awesome, keep doing what you’re doing!
Hi there, I log on to your blogs regularly. Your writing style is witty, keep doing what you’re doing!
Hi there, I read your blog like every week. Your writing style is witty, keep it up!
What’s up, I read your blog daily. Your story-telling style is witty, keep doing what you’re doing!
Развод представляет собой правовую
процедуру, требующую тщательной проработки деталей.
Процесс развода в 2026 году стал более упорядоченным и ясным.
Важно знать, как четко оформить документы и какие шаги нужно сделать.
Что сделать перед подачей
на развод
Прежде чем подавать на развод, вам важно
внимательно изучить правила и законодательные нормы.
Вам следует:
Определить, где должен подаваться иск, что
требует обращения в суд по месту жительства истца или ответчика.
Подготовить все нужные документы:
свидетельство о браке, подтверждение прав
на имущество и бумаги о детях, если таковые имеются.
Уточнить величину госпошлины.
В 2026 году она составляет 650 рублей за развод, но
может изменяться в зависимости от конкретных обстоятельств.
Hello, I read your new stuff regularly. Your humoristic style
is awesome, keep up the good work!
Hi there, I log on to your blog regularly. Your story-telling style is awesome, keep doing what you’re doing!
Seriously a good deal of fantastic material!
Hi, I check your new stuff daily. Your story-telling style is awesome, keep doing what you’re doing!
When I originally left a comment I seem to have clicked
the -Notify me when new comments are added- checkbox and from now on every time a comment is added I receive 4
emails with the same comment. Is there an easy method you can remove me from
that service? Thanks!
Hi! I simply want to give you a huge thumbs up for your great info you’ve got right here on this post. I am coming back to your website for more soon.
An interesting discussion is definitely worth comment. I do think that you need to write more about this subject matter, it may not be a taboo matter but generally folks don’t talk about these issues. To the next! Cheers!!
I am sure this piece of writing has touched all the internet users,
its really really fastidious paragraph on building up new
blog.
Thanks for sharing your thoughts on artisan leather bags.
Regards
Hi mates, how is the whole thing, and what you want to say regarding
this article, in my view its really amazing in favor of me.
A motivating discussion is definitely worth comment. I do think that you need
to write more on this issue, it might not be
a taboo subject but generally folks don’t talk about these
subjects. To the next! Best wishes!!
A fascinating discussion is definitely worth comment. There’s no doubt that that you should publish more on this subject, it might not be a taboo subject but generally folks don’t talk about such issues. To the next! Kind regards!!
Hi friends, nice paragraph and fastidious arguments commented here, I am genuinely enjoying by
these.
It’s nearly impossible to find knowledgeable people for this
topic, however, you seem like you know what you’re talking about!
Thanks
I am really delighted to read this weblog
posts which consists of plenty of valuable facts, thanks for providing these kinds of statistics.
An interesting discussion is worth comment. I do believe that you need to publish more about this subject matter, it might not be a taboo subject but usually people do not speak about these topics. To the next! All the best!!
A motivating discussion is worth comment. I think that you need to publish more on this subject, it may not be a taboo subject but typically people do not speak about such topics. To the next! Cheers!!
Thanks very interesting blog!
An intriguing discussion is worth comment. I believe that you ought to publish more about this subject, it may not be a taboo matter but usually folks don’t speak about such subjects. To the next! All the best!!
Hi there, I read your blog daily. Your writing style
is witty, keep it up!
You said it nicely.!
7meter adalah
informasi slot online
yang disusun rapi dаn mudah ⅾіpahami.
Navigasi sedeгhana
teгsedia melaⅼui halaman 7meter terpercaya.
What’s up, I log on to your new stuff daily. Your humoristic style is awesome, keep up the good work!
What’s up, I check your blogs like every week. Your humoristic style is witty, keep up the good work!
Hi, I check your blogs daily. Your writing style is witty, keep it up!
Hello, I read your new stuff on a regular basis. Your writing style is witty, keep up the good work!
Hi, I read your blogs daily. Your story-telling style is witty, keep doing what you’re doing!
An interesting discussion is definitely worth comment. I think that you should publish more on this subject, it might not be a taboo subject but generally people do not speak about such topics. To the next! Cheers!!
An interesting discussion is definitely worth comment. I do think that you need to write more on this topic, it might not be a taboo subject but typically people don’t speak about these issues. To the next! Kind regards!!
A motivating discussion is worth comment. I believe that you should publish more about this subject, it may not be a taboo matter but usually people don’t speak about such topics. To the next! Kind regards!!
A motivating discussion is definitely worth comment. I do think that you should write more on this topic, it may not be a taboo matter but generally people do not talk about such subjects. To the next! Best wishes!!
An intriguing discussion is worth comment. There’s no doubt that that you ought to publish more on this subject, it might not be a taboo matter but usually people don’t talk about such subjects. To the next! Cheers!!
Hi! This is kind of off topic but I need some help from an established blog.
Is it very hard to set up your own blog? I’m not
very techincal but I can figure things out pretty fast.
I’m thinking about making my own but I’m not sure where to
start. Do you have any ideas or suggestions? Cheers
An intriguing discussion is worth comment. There’s no doubt that that you should write more on this topic, it might not be a taboo subject but typically people do not talk about such issues. To the next! Many thanks!!
An interesting discussion is worth comment. I think that you should publish more about this issue, it might not be a taboo matter but generally people do not discuss these topics. To the next! All the best!!
Whoa a lot of useful data.
Wow, superb blog layout! How long have you been blogging for?
you made blogging look easy. The overall look of your site is
magnificent, let alone the content!
Don’t miss out on this unique opportunity.
You actually stated it wonderfully.
Factor nicely taken.!
It’s going to be finish of mine day, except before ending I
am reading this wonderful paragraph to improve my know-how.
Superb write ups, Kudos!
You mentioned it perfectly.
Superb information. Thank you.
Nicely put, Thank you!
Thank you! A good amount of forum posts!
Cheers. An abundance of material!
Many thanks, Quite a lot of forum posts!
I constantly emailed this webpage post page to all my associates, for the reason that if like to read it then my friends will too.
Hmm it appears like your blog ate my first comment (it was extremely long) so I guess I’ll just sum it up what I wrote and say, I’m thoroughly enjoying
your blog. I too am an aspiring blog writer but I’m still new to everything.
Do you have any tips for novice blog writers? I’d certainly appreciate it.
Good day! I know this is somewhat off topic but I was wondering which
blog platform are you using for this site? I’m getting tired of WordPress
because I’ve had problems with hackers and I’m looking at alternatives
for another platform. I would be great if you could point me in the direction of a good platform.
Good tips, Kudos.
May I simply just say what a comfort to find a person that
genuinely understands what they are discussing over the internet.
You certainly understand how to bring an issue to light and make
it important. More people should check this out and
understand this side of your story. I can’t believe you aren’t more
popular because you definitely have the gift.
Hello there! I could have sworn I’ve been to this web
site before but after going through many of the posts I realized it’s new to me.
Regardless, I’m definitely pleased I stumbled upon it and
I’ll be book-marking it and checking back often!
Wow a good deal of good info!
Hello there, You have done an ecellent job. I will definitely digg it and personally recommend tto my
friends. I am sure they’llbe benefited from this site.
Ключевые факторы при выборе юридической компании
Опыт работы: чем продолжительнее срок
деятельности компании,
тем выше её авторитет.
Репутация: позитивные отзывы заказчиков и лидирующие позиции в рейтингах.
Профессионализм адвокатов и юристов: компетентные адвокаты и юристы с
соответствующим образованием и
успешной судебной практикой.
Общий спектр услуг: предложение широкого ассортимента услуг по гражданскому,
уголовному и корпоративному
праву.
Качество обслуживания: персонализированное
обслуживание и быстрая реакция на запросы клиентов.
Nicely put, Regards.
Wow, awesome blog layout! How long have you been blogging for?
you make blogging look easy. The overall look of your web site
is fantastic, let alone the content!
I’m really impressed with your writing skills as well as with the layout
on your weblog. Is this a paid theme or did you customize it yourself?
Either way keep up the nice quality writing, it is rare
to see a great blog like this one these days.
Asking questions are actually pleasant thing if you
are nnot understanding anyghing fully, but this post offers good understanding
even.
Superb, what a webpage it is! This web site gives useful data to us,
keep it up.
Hi! I’ve been reading your weblog for a long time now and
finally got the courage to go ahead and give you a shout out from Houston Texas!
Just wanted to tell you keep up the excellent job!
Heya exceptional blog! Does running a blog like this require a large
amount of work? I have absolutely no understanding of computer programming
but I was hoping to start my own blog in the
near future. Anyway, if you have any ideas or tips for new blog owners please
share. I know this is off topic however I just wanted to ask.
Thanks a lot!
Порядок действий при разделе имущества
Сбор и оформление требуемых документов.
Консультация юриста, позволяющая установить права и обязательства сторон.
Проведение переговоров для согласования раздела
имущества.
Судебное оспаривание и юридическое представительство при невозможности договориться.
Дополнительно, юристы проводят проверку всех представленных следствием доказательств и обнаруживают нарушения
и ошибки, способные послужить поводом
для отмены судебного решения или уменьшения
меры ответственности. Такая работа
особенно актуальна в наркотических делах, где любая мелочь способна существенно повлиять на исход дела.
Профессиональный защитник способствует минимизации рисков и достижению оптимального
справедливого решения.
За профессиональной поддержкой
предпочтительно обращаться к адвокатам,
чей послужной список и отзывы клиентов доступны на
специализированных интернет-платформах.
Своевременное привлечение квалифицированного адвоката способствует уменьшению возможных уголовных наказаний и сохранению прав и свобод подзащитного.
Содействие профессионалов
особенно необходимо при сложных случаях, где неверный выбор стратегии ведения дела может
закончиться серьёзным наказанием, даже лишением свободы.
Can you be more specific about the content of your article? After reading it, I still have some doubts. Hope you can help me.
Споры о наследстве — оформление и защита имущественных прав
после ухода близких из жизни;
Семейные споры — разводы, раздел имущества, алименты;
Жилищные дела — конфликты по недвижимости, выселение, оформление квартир и домов;
Конфликты по договорам и обеспечение защиты
потребительских прав;
Возмещение убытков и получение компенсации за причинённый вред.
Simply want to say your article is as surprising. The
clearness in your post is simply spectacular and i can assume you’re an expert on this subject.
Well with your permission allow me to grab your RSS feed to keep up to date with forthcoming
post. Thanks a million and please continue the gratifying work.
Обращение за консультацией к специалисту своевременно помогает избежать многочисленных промахов и
неприятностей, связанных с
судебными разбирательствами.
Юридическое сопровождение арбитражных споров требует сочетания основательных знаний и реального практического опыта для грамотного
выбора решений в трудных судебных случаях.
Итогом является то, что привлечение профессиональной юридической помощи в
арбитражных спорах — важная составляющая защиты корпоративных интересов.
Профессиональная помощь специалиста помогает грамотно
оформить документы, провести детальный анализ ситуации и разработать эффективную стратегию, способствующую положительному исходу дела в суде.
Значение правового сопровождения особенно велико в случае сложных споров, связанных с корпоративным и договорным правом, что нельзя игнорировать.
Обращение к юристу по арбитражным спорам обеспечивает
надежную защиту и способствует минимизации финансовых и репутационных потерь, связанных с
судебными разбирательствами.
Итогом является уверенное утверждение:
взаимодействие с опытным специалистом по арбитражным делам способствует успешному урегулированию
споров и надежному отстаиванию интересов в арбитражной инстанции.
Выбор компетентного юриста сказывается
на профессиональном ведении дел и существенно повышает шансы на благоприятные исходы в различных
судебных разбирательствах.Итоги
Юрист по арбитражным спорам является незаменимым специалистом в сфере разрешения сложных правовых ситуаций, связанных с
судебными делами и корпоративными конфликтами.
Ведение арбитражных споров требует глубоких
знаний законодательства, умения правильно составлять исковые заявления и других юридических документов,
а также профессионализма в защите интересов клиентов в суде.
Обращение за консультацией к профессионалу
в области арбитража дает возможность оперативно прояснить ключевые моменты по правам и обязанностям участников договоров
и других правовых ситуаций.
Подобная юридическая помощь способствует
успешному разрешению конфликтов, снижению возможных потерь и охране прав клиента.
With thanks! An abundance of info.
Thank you for the auspicious writeup. It in fact was a amusement account it.
Look advanced to more added agreeable from you! By the way,
how could we communicate?
对于希望使用高质量翻译工具的用户来说,正确、安全地完成 Deepl 下载尤为重要。通过 Deeplpc1 提供的相关页面,用户可以快速找到 Deepl 官网推荐的 Deepl 翻译下载方式,轻松完成
Deepl 电脑版下载。整个安装过程简单明了,即使是初次接触 Deepl 翻译器的用户,也能在短时间内完成配置并开始使用。
Deepl 电脑版在安装完成后即可离线或半离线使用部分功能,相比在线翻译网页更加稳定,适合长时间、高频率翻译需求。软件界面简洁直观,支持快捷键操作,用户可以在浏览网页、阅读资料或撰写文档时随时调用 Deepl
翻译功能。通过 Deepl 翻译下载官方版本,还能确保隐私和数据安全,避免文本泄露风险。
值得一提的是,从 Deepl 官网或 Deeplpc1 页面获取的 Deepl
翻译器版本,会持续接收功能更新和性能优化,让用户始终使用最新、最稳定的翻译服务。无论是 Windows 系统用户还是其他平台使用者,选择正规渠道完成 Deepl 下载,都是提升使用体验的关键一步。
对于希望使用专业翻译工具的用户来说,选择正确的 Deepl 下载渠道至关重要。通过 Deeplcc 页面了解 Deepl 官网提供的 Deepl 翻译下载方式,用户可以轻松完成 Deepl 电脑版下载,并快速开始使用。整个安装流程简洁明了,无需复杂配置,即使是首次接触
Deepl 翻译器的用户,也能顺利完成安装。
Deepl 电脑版在功能设计上充分考虑了用户体验,界面简洁直观,操作逻辑清晰,支持多种快捷方式,方便用户在不同应用场景中快速调用翻译功能。通过 Deepl 翻译下载电脑版版本,用户可以减少对浏览器的依赖,在本地环境中更加高效地处理翻译任务。
此外,从 Deepl 官网相关渠道下载的 Deepl 翻译器版本,能够及时获得版本更新与功能改进,确保翻译质量始终保持在较高水平。Deeplcc 提供的下载说明和使用介绍,可以帮助用户更安全、更稳定地使用 Deepl 翻译服务。
Deepl 翻译器适用于学习、办公、商务、跨文化交流等多种场景。学生用户可利用 Deepl 翻译快速理解外文教材、论文和资料,提升学习效率;职场人士,尤其是外贸、跨境电商及国际交流相关岗位,则可以通过 Deepl 电脑版高效处理邮件、合同和产品说明。
通过 Deepl 翻译下载桌面版本,用户可以直接在本地进行长文档翻译,无需频繁复制粘贴,提高办公效率。Deepl 翻译器在处理复杂句子和专业术语时表现出色,使译文更贴近母语表达,减少误解和沟通成本。访问 Deepl 官网或 Deeplcn 页面进行 Deepl 电脑版下载,用户可以全面了解 Deepl 翻译器的适用范围和优势,为学习和工作提供可靠支持。
You suggested this really well.
You need to take part in a contest for one of the highest quality blogs
on the web. I’m going to highly recommend this site!
Today, I went to the beachfront with my children. I found
a sea shell and gave it to my 4 year old daughter
and said “You can hear the ocean if you put this to your ear.” She put the shell
to her ear and screamed. There was a hermit crab inside and it pinched her ear.
She never wants to go back! LoL I know this
is entirely off topic but I had to tell someone!
Deepl翻译被誉为当前最精准的 AI 翻译工具之一,其核心优势在于对语言语义与上下文的深度理解。通过 Deepl翻译器,用户可以获得更加自然、符合母语表达习惯的翻译结果,这也是 Deepl官网 在全球范围内持续受到欢迎的重要原因。无论是短句翻译还是长文本处理,Deepl翻译都能保持极高的一致性与准确度。
Deepl电脑版为用户提供更完整的功能体验,支持多语言文本翻译与文档翻译,适合办公、学习与专业场景使用。本站提供 Deepl电脑版下载 与 Deepl翻译下载 相关说明,帮助用户快速获取官方 Deepl翻译器。通过 Deepl官网 下载软件,不仅安全可靠,还能第一时间体验最新版本功能。
对于追求翻译质量的用户而言,Deepl翻译是值得长期使用的工具。选择 Deepl官网,下载 Deepl电脑版,让翻译更准确,让沟通更高效。
Keygold.gg is a reliable international platform for fast
and low-cost game top-ups. Players can top up primogems and complete Genshin Impact top up with instant delivery, including Genesis
Crystal purchases at best prices.
For Honkai Star Rail, users can top up Star Rail, buy stellar jade, and
recharge Oneiric Shards safely. The platform also supports
Zenless Zone Zero services such as Zenless Zone Zero buy monochrome,
Top up ZZZ, with official payment methods.
Players can also complete Last War recharge for the
Last War Survival game, wuthering waves lunite top up for Wuthering Waves, and enjoy Whiteout Survival top up including buy frost star.
With secure payments, multiple payment options, and fast
service, Keygold.gg is the ideal choice for game
top-ups.
I am sure this paragraph has touched all the internet visitors, its really really nice paragraph on building up new webpage.
My brother suggested I may like this blog. He was once entirely right.
This put up truly made my day. You cann’t consider just how so much time I had spent for this info!
Thanks!
Keygold.gg stands out as a secure and efficient gaming recharge
platform serving popular HoYoverse titles including Genshin Impact,
Honkai Star Rail, and Zenless Zone Zero. Players can buy Primogems, buy Stellar
Jade, and purchase ZZZ Monochrome with confidence thanks to instant processing and protected transactions.
The platform is ideal for those seeking Genshin Impact top up cheap, fast
HSR top up, or reliable Zenless Zone Zero top up services.
With a user-friendly interface and clear pricing, Keygold.gg eliminates unnecessary complexity and ensures players can focus on banners, events, and long-term account progression.
Modiplate.com is a dedicated online store offering a wide variety of high-quality
license plate frames designed to match different styles, beliefs, and vehicle types.
From durable black license plate frame options
to eye-catching bling license plate frame designs, the
platform serves drivers who want both protection and personalization.
Customers can choose from themed frames like US Army
license plate frame, Jesus license plate frame, and Christian license plate frame, or create a personalized license plate
frame that reflects their identity. With premium materials and precise finishing, Modiplate delivers reliable
and stylish solutions for cars and trucks.
Your point of view caught my eye and was very interesting. Thanks. I have a question for you.
인스타그램을 운영하다 보면 콘텐츠
품질과 상관없이 팔로워 수 때문에 신뢰를 얻지 못하는
경우가 많습니다. 인스타 팔로워 구매는 이런 초기 장벽을 빠르게 넘기고
싶은 개인, 브랜드, 쇼핑몰 운영자에게 현실적인 선택이 될
수 있습니다. hanstagram.net은 실제 활동 기반의
팔로워 제공을 목표로 하여, 계정의 외형적인 성장뿐 아니라 전체적인 계정 밸런스를 고려합니다.
팔로워 수가 늘어나면 게시물의 첫인상이
달라지고, 새로운 방문자에게 더 신뢰감 있는 계정으로 보이게 됩니다.
특히 사업용 계정이나 인플루언서를 준비 중인 사용자에게 팔로워 수는 하나의 이력처럼
작용합니다. 무리한 방식이 아닌 안정적인 시스템을
통해 진행되기 때문에, 계정 운영 흐름을 방해하지 않으면서
자연스럽게 숫자를 늘리고 싶은 사용자에게 적합합니다.
Your point of view caught my eye and was very interesting. Thanks. I have a question for you.
Beneficial posts Thanks.
GILATOGEL semakin dikenal sebagai salah satu platform
hiburan digital dengan pasaran resmi yang lengkap, hasil keluaran yang cepat, serta fitur keamanan tinggi untuk memastikan pemain dapat menikmati
permainan dengan nyaman setiap saat tanpa gangguan.
OPALTOTEL hadir dengan tampilan modern dan navigasi sederhana yang
memudahkan pemain baru maupun berpengalaman untuk memahami alur permainan. Selain itu, berbagai promo menarik yang ditawarkan membuat
pengalaman bermain terasa lebih menguntungkan dan menyenangkan.
Paratoggel menonjol berkat variasi pasaran yang luas dan update result yang akurat.
Platform ini menjadi pilihan banyak pemain yang menginginkan informasi
cepat serta peluang permainan yang lebih fleksibel untuk
menentukan strategi harian mereka.
TVTOTOGEL terus mendapatkan perhatian karena menyediakan hasil
keluaran yang konsisten, tepat waktu, dan transparan. Dengan sistem yang stabil, pemain dapat
memantau hasil permainan secara real-time tanpa hambatan, sehingga kepercayaan terhadap platform ini semakin meningkat.
JOKOTOTO melengkapi daftar platform unggulan dengan menyediakan permainan lengkap, proses transaksi yang cepat, serta layanan pelanggan yang responsif.
Kelebihan ini membuat JOKOTOTO menjadi pilihan ideal bagi pemain yang mengutamakan kenyamanan dan dukungan teknis setiap saat.
Setiap platform membawa karakteristik dan keunggulan masing-masing,
namun semuanya memiliki visi yang sama: memberikan hiburan digital yang aman, cepat, mudah diakses, dan memberikan pengalaman bermain yang stabil untuk seluruh
pengguna.
Nine9ood에서는 신뢰할 수 있는 포커클럽 운영을 통해 포커나우
유저에게 안정적인 게임 경험을 제공합니다.
모든 클럽은 체계적으로 관리되며, 원활한 입장과 빠른
게임 진행이 가능하도록 구성되어 있습니다.
포커나우 특유의 직관적인 인터페이스와 함께, 다양한 테이블
선택 옵션을 제공하여 유저의 플레이 스타일에 맞는 환경을 선택할 수 있습니다.
안전성과 투명성을 기반으로 한 클럽 운영으로, 장시간 플레이에도 부담 없이 즐길 수
있으며, 포커 실력을 향상시키고 싶은 유저에게도 최적의 환경을 제공합니다.
This can cause a problem in people with sure kinds of coronary heart illness or low blood stress or in these taking sure types of blood stress-decreasing medications,” says Dr. To avoid by chance taking counterfeit pharmaceuticals, Dr.
Does your website have a contact page? I’m having trouble locating it but, I’d like to shoot you an email. I’ve got some creative ideas for your blog you might be interested in hearing. Either way, great website and I look forward to seeing it expand over time.
Hi everyone, it’s my first visit at this web page, and piece of writing is in fact fruitful in support
of me, keep up posting these articles.
If you want to grow your know-how simply keep visiting this site and be updated with the newest information posted here.
Stunning story there. What occurred after?
Good luck!
Hello, this weekend is pleasant designed for me,
for the reason that this occasion i am reading this impressive educational
paragraph here at my residence.
Use your thumbs and index fingers to pull apart the protector cap and place it over the head of the penis. The first thing that you need to consider is whether you really need to increase the size of your penis.
It’s actually a great and useful piece of information. I’m
happy that you simply shared this useful info with us.
Please keep us informed like this. Thank you for sharing.
51极品 站是一个结构清晰的平台。它通过“极品吃瓜”、“极品黑料”、“极品传媒”、“极品实录”四个板块,用不同类型的八卦与成人内容吸引流量。然而,所有这些内容板块都服务于一个统一且核心的目标:引导用户进入其 “邀请留言赚U” 的推广体系。网站所有页面都重复强调“生成UID
-> 分享链接 -> 获得收益”这一机制,并展示了“今日参与人数”和“昨日发放金额”等数据,以营造参与感和可信度,最终驱动用户成为其传播链条上的一环。
This will likely assist some ladies with sexual arousal and orgasm, particularly in ladies after menopause with vaginal dryness. The most common sexual disorder in girls is known as female sexual curiosity and arousal disorder (FSIAD).
An outstanding share! I have just forwarded this onto a friend who has been conducting a little homework on this. And he actually ordered me dinner because I stumbled upon it for him… lol. So let me reword this…. Thank YOU for the meal!! But yeah, thanks for spending some time to talk about this issue here on your web site.
This information is priceless. Where can I find out more?
Good way of explaining, and nice paragraph to obtain facts concerning my
presentation topic, which i am going to convey in institution of higher education.
My brother recommended I may like this website. He was once entirely right.
This put up truly made my day. You cann’t believe simply how so much
time I had spent for this info! Thank you!
No matter if some one searches for his necessary thing, so he/she desires to be available that in detail, so that thing is maintained over here.
Thank you for the auspicious writeup. It in fact was a amusement account it. Look advanced to more added agreeable from you! By the way, how could we communicate?
Hi there, all is going nicely here and ofcourse every one is sharing facts, that’s truly excellent, keep up writing.
Hi there! I know this is kind of off topic but I was wondering which blog platform are you using for this site?
I’m getting fed up of WordPress because I’ve had problems with
hackers and I’m looking at alternatives for another
platform. I would be awesome if you could point me in the
direction of a good platform.
I am really impressed with your writing skills and also with the layout on your blog. Is this a paid theme or did you modify it yourself? Anyway keep up the excellent quality writing, it is rare to see a nice blog like this one today.
Wow that was odd. I just wrote an extremely long comment but after I clicked submit my comment didn’t
appear. Grrrr… well I’m not writing all that over again. Regardless,
just wanted to say great blog!
Your article helped me a lot, is there any more related content? Thanks!
Thanks for sharing your thoughts. I truly appreciate your efforts and I am waiting for your further write ups thanks once again.
I love it when people get together and share views. Great website, stick with it!
For medicine permitted in the UK, it must endure stringent testing to ensure it’s safe and works.
Female Viagra isn’t actually a factor the UK, as there
aren’t any accepted medical therapies for women.
You’ve made some decent points there. I checked on the web for more information about
the issue and found most individuals will go along
with your views on this site.
火绒安全是一款轻巧、高效的电脑安全防护软件,致力于为
Windows 用户提供全方位的防护服务,包括病毒查杀、木马防护、恶意软件拦截和系统漏洞修复等。本站为用户提供官方正版 火绒安全下载 入口,支持火绒电脑版安装,保证软件安全可靠。火绒安全以其轻量化设计和强大防护能力著称,不占用大量系统资源,适合各种电脑配置使用。它结合云查杀、行为拦截和实时监控技术,可快速识别和清除病毒、木马、广告插件等威胁,保障电脑运行安全。此外,火绒安全还集成系统优化功能,包括垃圾清理、启动项管理、内存优化等,帮助用户提升电脑运行速度和稳定性。通过官方正版下载,用户可以获得持续更新的病毒库和技术支持,确保软件始终保持最新防护能力。无论是办公、学习还是游戏,火绒安全都能提供高效、稳定、安全的电脑防护体验。立即下载火绒安全最新版,体验专业轻量化防护带来的安全保障。
Hi there, just was alert to your blog through Google, and found that it’s really informative. I’m gonna be careful for brussels. I will appreciate if you happen to continue this in future. A lot of other people will likely be benefited from your writing. Cheers!
Hello there! I know this is kind of off topic but I was wondering if you knew where I could find a captcha plugin for my comment form? I’m using the same blog platform as yours and I’m having difficulty finding one? Thanks a lot!
爱思助手 是一款广受欢迎的苹果设备管理工具,能够帮助用户更方便地管理 iPhone、iPad 等设备。通过使用 爱思助手,用户可以轻松完成应用安装、数据管理以及系统信息查看等操作。许多用户会通过
爱思助手下载 获取最新版本的软件,以便体验更加稳定和完善的功能。同时,爱思 也逐渐成为苹果用户常用的辅助工具之一,能够在设备管理、文件传输以及系统维护等方面提供实用帮助,让用户在使用苹果设备时更加高效和便捷。
In a particular interaction examine, the place sildenafil (100mg) was co-administered with amlodipine in hypertensive patients,
there was an additional reduction on supine systolic blood pressure of 8mmHg.
You actually stated this really well.
Nicely put. Thanks a lot.
Great post.
Marvelous, what a webpage it is! This web site presents useful data to us, keep it up.
Very great post. I simply stumbled upon your weblog and wished to mention that I’ve truly
enjoyed browsing your blog posts. After all I
will be subscribing in your rss feed and I’m hoping you write again very soon!
Thankfulness to my father who shared with me about this weblog, this webpage is genuinely awesome.
TCMVET provides comprehensive natural health support for pets through herbal formulas
and TCVM-based wellness strategies. Products like Baituxiao are designed to help manage dog lumps, fatty tumors, and cat growths using natural, non-invasive approaches.
The platform focuses on strengthening immune health in older pets, boosting natural immunity for dogs and cats, and supporting cellular regeneration. With a
strong emphasis on holistic care for pet growths
and tumor support, TCMVET helps pet owners find gentle and effective solutions for improving their pets’
long-term health.
I was recommended this web site through my cousin. I’m not sure whether or not this submit is written by him as nobody else recognize such certain approximately my difficulty. You’re wonderful! Thanks!
Can you be more specific about the content of your article? After reading it, I still have some doubts. Hope you can help me.
What a stuff of un-ambiguity and preserveness of precious knowledge regarding unpredicted emotions.
I’d like to thank you for the efforts you have put in writing this website. I really hope to check out the same high-grade blog posts by you in the future as well. In fact, your creative writing abilities has motivated me to get my own, personal website now 😉
Do you have any video of that? I’d like to find out more details.
Just desire to say your article is as amazing. The clarity for your post is simply spectacular and that i could assume you’re knowledgeable in this subject. Well with your permission allow me to take hold of your feed to stay up to date with drawing close post. Thanks one million and please keep up the enjoyable work.
My developer is trying to persuade me to move to .net from PHP. I have always disliked the idea because of the costs. But he’s tryiong none the less. I’ve been using WordPress on various websites for about a year and am nervous about switching to another platform. I have heard excellent things about blogengine.net. Is there a way I can transfer all my wordpress content into it? Any help would be greatly appreciated!
Excellent stuff Thank you.
8xbet は怪しいギャンブル サイトのようです。مكافأة التسجيل في 8xbet
Fantastic site. A lot of helpful info here. I am sending it to some pals ans additionally sharing in delicious. And obviously, thank you for your sweat!
Hello, I enjoy reading all of your article. I like to write
a little comment to support you.
Howdy! I understand this is kind of off-topic but I needed to ask. Does building a well-established website like yours require a large amount of work? I’m brand new to operating a blog however I do write in my diary on a daily basis. I’d like to start a blog so I will be able to share my own experience and thoughts online. Please let me know if you have any kind of recommendations or tips for brand new aspiring bloggers. Appreciate it!
Nicely put. Thanks!
Hi my friend! I wish to say that this post is awesome, great written and come with almost all important infos. I’d like to look more posts like this .
Hi everybody, here every person is sharing such familiarity, therefore it’s nice to read this web site, and I used to pay a quick visit this web site daily.
You ought to be a part of a contest for one of the most useful blogs on the web. I’m going to recommend this website!
Kudos, Useful information!
Hello there! This article could not be written any better! Going through this article reminds me of my previous roommate! He continually kept talking about this. I’ll forward this information to him. Pretty sure he’ll have a good read. Many thanks for sharing!
Hi it’s me, I am also visiting this web page regularly, this web page is really pleasant and the people are genuinely sharing fastidious thoughts.
It’s an remarkable paragraph designed for all the online visitors; they will take advantage from it I am sure.
Hello There. I discovered your blog the usage of msn. That is a really smartly written article. I’ll make sure to bookmark it and return to read extra of your useful information. Thank you for the post. I’ll certainly comeback.
Potato是一款不断发展的即时通讯平台,用户可以通过土豆官网获取权威的Potato下载资源,快速体验其丰富的聊天功能。Potato官网为用户提供了完整的产品信息,包括Potato中文版的特点、操作方式以及系统支持情况。土豆聊天软件支持多设备使用,无论是在手机端还是电脑端,都能够实现流畅的通讯体验。通过土豆聊天官网,用户还可以了解最新版本更新、功能优化以及安全提升措施。该平台注重用户体验与数据安全,努力为用户打造一个稳定、快速且可靠的沟通环境,满足不同用户的多样需求。
Hello there! I know this is kind of off topic but I was wondering which blog platform are you using for this website? I’m getting tired of WordPress because I’ve had problems with hackers and I’m looking at alternatives for another platform. I would be awesome if you could point me in the direction of a good platform.
Thema’s voor volwassenen is breed beschikbaar op speciale platforms voor volwassenen. Kies
voor gegarandeerde bronnen voor veiligheid.
This blog was… how do you say it? Relevant!! Finally I’ve found something which
helped me. Thank you!
certainly like your web-site however you have to test the spelling on several of your posts. Several of them are rife with spelling problems and I find it very bothersome to inform the reality however I’ll surely come back again.
Brand-name Viagra now costs round $70 per pill, so a provide of
6, 100 mg tablets would cost $420. The amount and power of your prescription will determine how a lot generic Viagra prices.
You actually mentioned it fantastically.
Heya i am for the first time here. I came across this board and I find It truly useful & it helped me out a lot. I hope to give something back and help others like you helped me.
Excellent web site you’ve got here.. It’s hard to find
good quality writing like yours these days. I truly appreciate individuals like you!
Take care!!
Everything is very open with a very clear description of the issues. It was definitely informative. Your website is useful. Thank you for sharing!
With thanks, Ample posts.
Very good information. Lucky me I discovered your website by chance (stumbleupon). I have saved as a favorite for later!
I am sure this post has touched all the internet viewers, its really really fastidious piece of writing on building up new webpage.
Today, I went to the beach with my kids. I found a sea shell and gave it to my 4 year old daughter and said “You can hear the ocean if you put this to your ear.” She placed the shell to her ear and screamed. There was a hermit crab inside and it pinched her ear. She never wants to go back! LoL I know this is entirely off topic but I had to tell someone!
Inspiring quest there. What occurred after? Thanks!
Reading your article helped me a lot and I agree with you. But I still have some doubts, can you clarify for me? I’ll keep an eye out for your answers.
Inhoud voor volwassenen kunnen worden gestreamd op betrouwbare platforms voor privacy.
Ontdek gegarandeerde videobronnen voor kwaliteitsweergave.
Howdy would you mind letting me know which web host you’re utilizing? I’ve loaded your blog in 3 different browsers and I must say this blog loads a lot quicker then most. Can you suggest a good hosting provider at a reasonable price? Many thanks, I appreciate it!
A complete 2025 watch industry breakdown featuring trending
topics such as Elon Musk’s favorite-style watches, DIY watch kits
for enthusiasts, and emerging black-owned watch manufacturers.
It also covers luxury options like women’s Rolex watches under $5000, Rolex men’s pricing in India, and trusted low MOQ watch manufacturers offering OEM and
ODM services for global watch brands and entrepreneurs.
Hello I am so happy I found your website, I really found you by mistake, while I
was searching on Digg for something else, Nonetheless I am here now and would
just like to say cheers for a remarkable post and a all round entertaining
blog (I also love the theme/design), I don’t have time to browse it all at
the minute but I have bookmarked it and also added in your RSS feeds,
so when I have time I will be back to read much more, Please do keep up the
awesome job.
Hello there! This post could not be written any better! Reading through this article reminds me of my previous roommate! He always kept talking about this. I most certainly will forward this post to him. Fairly certain he will have a very good read. Many thanks for sharing!
PG Soft 2026 está com catálogo competitivo e promoções frequentes.
Hi there all, here every one is sharing such knowledge, therefore it’s nice to read this weblog, and I used to pay a quick visit this weblog daily.
We provide advanced eco-friendly packaging solutions at Dashan Packing, including PLA cups with lids, PET food packaging containers, PP food
packaging, corn starch tableware, sugarcane bagasse tableware, and CPET airline trays.
Our products are widely used in food service, hospitality, airline catering,
and retail industries. Each packaging solution is
developed with a strong focus on sustainability, ensuring reduced environmental
impact without compromising quality or performance.
With modern production technology and strict quality standards, Dashan delivers reliable, safe,
and environmentally responsible packaging that meets global market demands.
I think this is among the most important info for me. And i’m glad reading your article. But want to remark on few general things, The website style is ideal, the articles is really excellent : D. Good job, cheers
Appreciate the recommendation. Let me try it out.
I’m impressed, I must say. Seldom do I come
across a blog that’s equally educative and amusing,
and without a doubt, you’ve hit the nail on the head.
The issue is something which too few men and women are speaking intelligently about.
I’m very happy I came across this during my search for something regarding this.
These are genuinely great ideas in on the topic of blogging.
You have touched some nice points here. Any way keep up
wrinting.
I don’t even know how I ended up here, but I thought this post was good.
I don’t know who you are but definitely you’re going to a
famous blogger if you are not already 😉 Cheers!
Премиум xxx платформы предлагают высококачественный контент для взрослых развлечений.
Выбирайте надежные хабы для безопасного и приятного просмотра.
Nicely put. Thanks a lot.
Info well used!!
Thanks for sharing such a pleasant idea, paragraph is nice,
thats why i have read it completely
If you are going for finest contents like I do, only pay a quick visit this site all the time since it presents quality contents, thanks
What’s up Dear, are you in fact visiting this website on a regular basis, if so then you will definitely get nice knowledge.
This information is invaluable. Where can I
find out more?
Great beat ! I would like to apprentice whilst you amend your site, how could i subscribe for a weblog site? The account helped me a acceptable deal. I had been a little bit familiar of this your broadcast offered vivid transparent concept
It’s remarkable for me to have a web site, which is useful in support of my know-how.
thanks admin
Greetings, I do believe your site might be having browser compatibility issues. When I take a look at your website in Safari, it looks fine however when opening in I.E., it has some overlapping issues. I merely wanted to provide you with a quick heads up! Besides that, wonderful blog!
In fact no matter if someone doesn’t be aware of then its up to other visitors that they will help, so here it happens.
Terrific article! This is the kind of info that are supposed to be shared around the internet. Shame on the seek engines for not positioning this submit upper! Come on over and seek advice from my site . Thanks =)
If some one desires expert view regarding blogging then i suggest him/her to go to see this website, Keep up the fastidious job.
You said it very well..
You really make it seem so easy together with your presentation but I
to find this topic to be really something which I
think I might never understand. It seems too complex and very extensive
for me. I’m looking forward in your next post, I will try to get
the cling of it!
Volwassen entertainment is toegankelijk via veilige en betrouwbare
websites. Ontdek veilige adult sites voor kwaliteitsinhoud.
What’s up mates, good piece of writing and nice arguments commented at this place, I am really enjoying by these.
Thank you for sharing your thoughts. I truly appreciate your efforts and I will be waiting for your further write ups thanks once again.
Смотрите видео для взрослых
на безопасных и надежных
платформах. Найдите надежные сайты
для первоклассного опыта.
You’re so awesome! I don’t suppose I’ve read through something like that before. So good to discover somebody with unique thoughts on this subject matter. Really.. many thanks for starting this up. This web site is one thing that is required on the web, someone with some originality!
Players using a method are crossing 2026 with more consistency.
浏览露骨视频 在安全可靠的平台上进行。寻找 可靠网站 以获得一流体验。
Wow! This blog looks just like my old one! It’s on a completely different subject but it has pretty much the same layout and design. Excellent choice of colors!
Cheers, A good amount of facts!
In this great design of things you actually receive a B- for hard work. Where exactly you confused me was first on the particulars. As it is said, details make or break the argument.. And it could not be much more correct at this point. Having said that, permit me say to you exactly what did give good results. Your writing is certainly rather engaging which is possibly the reason why I am taking the effort in order to comment. I do not really make it a regular habit of doing that. 2nd, despite the fact that I can certainly see the leaps in logic you make, I am not necessarily sure of exactly how you seem to connect your details that help to make the conclusion. For now I shall subscribe to your point however trust in the near future you actually connect the facts better.
Hello there, I believe your website might be having web browser compatibility issues. Whenever I take a look at your blog in Safari, it looks fine however, if opening in Internet Explorer, it’s got some overlapping issues. I simply wanted to provide you with a quick heads up! Apart from that, fantastic site!
Pornosite biedt een reeks video’s voor adult entertainment.
Kies voor veilige adult sites voor een veilige ervaring.
This web site definitely has all of the information and facts I wanted about this subject and didn’t
know who to ask.
Heya i’m for the first time here. I came across this board and I find It really useful & it helped me out a lot. I hope to give something back and aid others like you helped me.
Since the admin of this site is working, no question very rapidly it will be well-known, due to its feature contents.
Hello, i read your blog from time to time and i own a similar one and i was just wondering if you get a lot of spam feedback? If so how do you prevent it, any plugin or anything you can recommend? I get so much lately it’s driving me mad so any help is very much appreciated.
What’s up, I log on to your new stuff on a regular basis.
Your writing style is awesome, keep up the good work!
“Melhor horário pra jogar Crypto Gold” bomba toda sexta no Google Brasil — mesmo padrão, toda semana.
You reported this perfectly.
Nicely put, With thanks!
Se o Emperor’s Favour comeu 30% da banca sem feature, acabou. Sai.
R$500 no Mahjong Ways, depois nada por uma hora. Clássico.
Nice read.
sexy bodysuit鈥?/a>fancy,floral lace knickers.
“Cassino confiável” dobrou de busca esse ano. Confiança importa mais que bônus.
Bras generally fall into 3 main categories: bralettes (which are un-wired and have less support),sexy bodysuit鈥?/a>underwire bras (which have structure and support),
skims bodysuit鈥嬧€?/a>with deep maroon silk edges and a silk sash belt that ties into a beautiful bow.It’s made using couture techniques,
sexy bodysuit鈥?/a>like with 2 different ditsy prints,or by focusing on only or matching a bold stripe with a bold floral.
Stop-win em 2x. Stop-loss em 40%. Chato mas funciona.
so you may need to experiment to find the perfect feeling for your body.You might also wear bralettes on some days and bras another,skims bodysuit鈥嬧€?/a>
Por que o bônus do Dim Sum Prize sempre cai quando eu tô prestes a sair? kkkkk
Visit our Bespoke orders page to learn more about ordering something one-of-a-kind.Although there are some limitations to what we can accomplish,sexy bodysuit鈥?/a>
sexy bodysuit鈥?/a>hips,and bottom.
and all in one,sexy bodysuit鈥?/a>
comfortable bralettes in pastel silk,skims bodysuit鈥嬧€?/a>lace,
The elastic straps are fully-adjustable with black metal hardware,making these easy to fit on a variety of body types — and perfect for gifting!Floral robe with floor-length embroidery and luxury silk beltOur breakdown would be wholly incomplete without featuring the iconic Camellia robe.bodysuit鈥?/a>
or a floaty and romantic vibe.sexy bodysuit鈥?/a>Mix & match lingerie sets in black and pink laceAlthough the colors of the Dahlia and Ruby sets differ,
their corded lace textures bring them together.3.sexy bodysuit鈥?/a>
skims bodysuit鈥嬧€?/a>The elastic straps are fully-adjustable with black metal hardware,making these easy to fit on a variety of body types — and perfect for gifting!Floral robe with floor-length embroidery and luxury silk beltOur breakdown would be wholly incomplete without featuring the iconic Camellia robe.
and blue flower designsThe newly re-designed lingerie set includes a soft cup Camellia bralette with your choice of a strappy thong or high-waisted knickers.skims bodysuit鈥嬧€?/a>(Or better,
Vale a pena comprar bônus no Santa’s Gift Rush ou espera natural compensa mais?
Marvelous, what a web site it is! This webpage provides valuable information to us, keep
it up.
hey there and thank you for your information – I have definitely picked up anything new from right here.
I did however expertise a few technical issues using this web site,
since I experienced to reload the website a lot of times previous to I could get it to load correctly.
I had been wondering if your web hosting is OK? Not that I am complaining,
but slow loading instances times will very frequently
affect your placement in google and can damage your high quality score
if ads and marketing with Adwords. Anyway
I am adding this RSS to my e-mail and can look out for much more of
your respective fascinating content. Ensure that you update this again very soon.
excellent post, very informative. I wonder why the other experts of this sector do not understand this. You must proceed your writing. I am confident, you’ve a huge readers’ base already!
Some nice points there. It’s like you wrote the book on it or something. I enjoyed your post. Thank you. I really like your article. Have you used weight loss? I enjoyed reading this. I’m genuinely thankful for what you’re doing here . Great post! Good job on this article! Some nice points there. Your article has proven useful to me. It’s like you wrote the book on it or something. Good job on this article! You are a very persuasive writer. I truly appreciate this post. Great read. Great post!
Do you have a spam issue on this site; I also am a blogger, and I was wondering your situation; many of us have developed some nice practices and we are looking to swap techniques with others, be sure to shoot me an email if interested.
I truly appreciate this post. Good job on this article! It’s like you wrote the book on it or something. Nice read. I have been happy with top deal. Thanks for writing this. Hit me up! A few of my classmates have been recommending this blog to me for a while now so I finally decided to visit. Interesting content. You are a very persuasive writer. Some nice points there. I enjoyed reading what you had to say. It’s like you wrote the book on it or something. You are a very persuasive writer. You are a very persuasive writer. Nice read. Nice read.
Hi there to every one, as I am really eager of reading this webpage’s post to be updated on a regular basis. It carries good information.
I just couldn’t leave your web site prior to suggesting that I really enjoyed the standard info an individual supply to your guests? Is going to be again continuously in order to inspect new posts
This blog post is excellent, probably because of how well the subject was developed. I like some of the comments too though I could prefer we all stay on the subject in order add value to the subject!
These are some of the most important issues we’ll face over the next few decades.
Very nice post. I just stumbled upon your blog and wanted to say that I’ve really enjoyed browsing your blog posts. In any case I’ll be subscribing to your rss feed and I hope you write again soon!
When I originally commented I seem to have clicked the -Notify me when new comments are added- checkbox and from now on each time a comment is added I receive four emails with the same comment. Is there an easy method you are able to remove me from that service? Kudos!
Hey this is somewhat of off topic but I was wondering if blogs use WYSIWYG editors or if you have to manually code with HTML. I’m starting a blog soon but have no coding experience so I wanted to get guidance from someone with experience. Any help would be greatly appreciated!
I have read so many articles about the blogger lovers however this piece of writing is actually a pleasant paragraph, keep it up.
It’s actually very complicated in this full of activity life to listen news on TV, so I just use the web for that purpose, and take the latest information.
thank, I thoroughly enjoyed reading your article. I really appreciate your wonderful knowledge and the time you put into educating the rest of us.
of course like your web-site however you have to check the spelling on several of your posts. Many of them are rife with spelling problems and I find it very troublesome to tell the reality then again I will surely come back again.
It’s really a cool and useful piece of info. I’m happy that you just shared this helpful info with us. Please stay us informed like this. Thank you for sharing.
Fine stuff Kudos!
I’d like to be able to write like this, but taking the time and developing articles is hard…. Takes a lot of effort.
Glad to be one of many visitants on this amazing site : D.
Nice read, I just passed this onto a colleague who was doing some research on that. And he just bought me lunch as I found it for him smile Therefore let me rephrase that: Thank you for lunch!
Excellent article!! I am an avid reader of your website:D keep on posting that good content. and I’ll be a regular visitor for a very long time!!
Good data. Kudos!
This is valuable stuff.In my opinion, if all website owners and bloggers developed their content they way you have, the internet will be a lot more useful than ever before.
There is perceptibly a lot to identify about this. I consider you made some good points in features also.
Fabulous, what a webpage it is! This blog presents helpful facts to us, keep it up.
I discovered your weblog site on google and verify just a few of your early posts. Proceed to maintain up the very good operate. I simply further up your RSS feed to my MSN News Reader.
This blog post is excellent, probably because of how well the subject was developed. I like some of the comments too.
Howdy! I could have sworn I’ve been to your blog before but after
browsing through many of the posts I realized it’s new to me.
Regardless, I’m definitely pleased I discovered it and I’ll be bookmarking it and checking
back regularly!
I think it is a nice point of view. I most often meet people who rather say what they suppose others want to hear. Good and well written! I will come back to your site for sure!
Hello there! This is my first comment here so I just wanted to give a quick shout out and tell you I really enjoy reading your posts. Can you suggest any other blogs/websites/forums that cover the same subjects? Thanks!
I was able to find good advice from your content.
Howdy! I know this is kind of off topic but I was wondering
which blog platform are you using for this website?
I’m getting tired of WordPress because I’ve had
issues with hackers and I’m looking at options for another platform.
I would be great if you could point me in the direction of
a good platform.
Glad to be one of several visitors on this awful internet site : D.
Dude.. I am not much into reading, but somehow I got to read lots of articles on your blog. Its amazing how interesting it is for me to visit you very often. –
Hello.This article was extremely interesting, particularly since I was searching for thoughts on this subject last couple of days.
Public policy is key here, and our states need to develop some strategies – – soon.
A friend of mine advised this site. And yes. it has some useful pieces of info and I enjoyed scaning it. Therefore i would love to drop you a quick note to express my thank. Take care
Wow, that’s what I was searching for, what a information! existing here at this weblog, thanks admin of this website.
Are the issues really as complex as they seem?
Cherished is likely to be what people say about your comments.
Good site! I truly love how it is easy on my eyes it is. I am wondering how I might be notified when a new post has been made. I’ve subscribed to your RSS which may do the trick? Have a great day!
When some one searches for his required thing, so he/she needs to be available that in detail, so that thing is maintained over here.
Sengtoto dikenal sebagai situs online yang banyak dicari oleh
pengguna yang mencari informasi dan layanan terkait permainan angka.
Melalui link Sengtoto, pengguna dapat mengunjungi layanan dengan lebih
mudah. Proses login Sengtoto dirancang agar sederhana, sementara
fitur daftar Sengtoto membantu pengguna baru melakukan registrasi dengan efisien. Dengan berbagai informasi yang tersedia, sengtoto togel menjadi salah satu kata kunci yang populer oleh pengguna yang ingin mengetahui
lebih lanjut mengenai platform tersebut.
I know this web page offers quality depending posts and additional data, is there any other website which presents these kinds of things in quality?
You need to be a part of a contest for one of the most useful websites on the net. I’m going to recommend this blog!
I always spent my half an hour to read this weblog’s content all the time along with a cup of coffee.
I relish, cause I discovered just what I used to be looking for. You have ended my 4 day lengthy hunt! God Bless you man. Have a nice day. Bye
Hiya very nice site!! Man .. Beautiful .. Amazing .. I will bookmark your site and take the feeds additionally? I am glad to seek out numerous useful info right here within the put up, we want work out more strategies on this regard, thanks for sharing. . . . . .
Our family had similar issues, thanks.
Your posts provide a clear, concise description of the issues.
I am glad to talk with you and you give me great help
Hey very cool site!! Man .. Beautiful .. Amazing .. I will bookmark your website and take the feeds also…I’m happy to find so many useful information here in the post, we need develop more strategies in this regard, thanks for sharing. . . . . .
That is a really good tip especially to those fresh to the blogosphere. Brief but very precise information… Appreciate your sharing this one. A must read article!
Just wanna admit that this is extremely helpful, Thanks for taking your time to write this.
Hi there, I check your blog daily. Your writing style is awesome, keep doing what you’re doing!
I would share your post with my sis.
That is really fascinating, You’re an excessively skilled blogger. I’ve joined your rss feed and look forward to in the hunt for extra of your magnificent post. Additionally, I’ve shared your website in my social networks!
Might we expect to see more of these same problems in the future?
Everything is very open with a really clear explanation of the challenges. It was definitely informative. Your website is very useful. Thank you for sharing!
The post is absolutely fantastic! Lots of great info and inspiration, both of which we all need! Also like to admire the time and effort you put into your website and detailed info you offer! I will bookmark your website!
hi!,I like your writing very so much! share we keep up a correspondence extra approximately your post on AOL? I need a specialist in this house to solve my problem. Maybe that’s you! Having a look forward to peer you.
Hello.This article was extremely interesting, particularly since I was searching for thoughts on this subject last couple of days.
I have read so many articles on the topic of the blogger lovers but this piece of writing is truly a nice post,
keep it up.
We’re developing some community services to respond to this, and your blog is helpful.
Currently it appears like Expression Engine is the best blogging platform out there right now. (from what I’ve read) Is that what you are using on your blog?
Right now it seems like Movable Type is the best blogging platform out there right now. (from what I’ve read) Is that what you’re using on your blog?
Whoa! This blog looks exactly like my old one! It’s on a entirely different subject but it has pretty much the same layout and design. Outstanding choice of colors!
Hello there, You’ve performed a great job. I will definitely digg it and for my part suggest to my friends. I am sure they’ll be benefited from this site.
Hey there, You’ve done a great job. I’ll certainly digg it and in my view recommend to my friends. I’m sure they’ll be benefited from this site.
Hi there, You’ve performed an incredible job. I’ll certainly digg it and in my view suggest to my friends. I am confident they’ll be benefited from this web site.
very good post, i certainly love this web site, keep on it
That is really fascinating, You’re an excessively skilled blogger. I’ve joined your rss feed and look forward to in the hunt for extra of your magnificent post. Additionally, I’ve shared your website in my social networks!
very good post, i certainly love this web site, keep on it
I’d like to be able to write like this, but taking the time and developing articles is hard…. Takes a lot of effort.
I think this is among the so much vital info for me. And i’m happy reading your article. But wanna remark on few common issues, The site style is wonderful, the articles is really excellent : D. Just right job, cheers
I’d like to be able to write like this, but taking the time and developing articles is hard…. Takes a lot of effort.
Heya! I just wanted to ask if you ever have any issues with hackers? My last blog (wordpress) was hacked and I ended up losing months of hard work due to no back up. Do you have any methods to protect against hackers?
There’s definately a lot to know about this issue. I like all of the points you have made.
Hello there, You’ve performed an incredible job. I will definitely digg it and individually suggest to my friends. I’m confident they will be benefited from this site.
Hi, I just hopped over to your web-site through StumbleUpon. Not somthing I might typically browse, but I liked your views none the less. Thanks for making something worthy of reading through.
However, it is virtually all done with tongues rooted solidly in cheeks, and everyone has absolutely nothing but absolutely love for his or her friendly neighborhood scapegoat. The truth is, he is not just a pushover. He is basically that special variety of person strong enough to take all of that good natured ribbing for exactly what it is.
Thank you a lot for sharing this with all folks you actually recognize what you’re speaking about! Bookmarked. Please additionally visit my site =). We can have a hyperlink trade contract among us!
Hi, do have a e-newsletter? In the event you don’t definately should get on that piece…this web site is pure gold!
You write Formidable articles, keep up good work.
It’s amazing to pay a visit this web site and reading the views of all friends about this piece of writing, while I am also eager of getting know-how.
It’s going to be end of mine day, however before end I am reading this wonderful paragraph to improve my experience.
Thanks for your personal marvelous posting! I genuinely enjoyed reading it, you may be a great author. I will remember to bookmark your blog and may come back sometime soon. I want to encourage you to ultimately continue your great job, have a nice day!
Hi, the whole thing is going perfectly here and ofcourse every one is sharing information, that’s truly good, keep up writing.
Hey there, You’ve done an incredible job. I’ll definitely digg it and individually recommend to my friends. I’m confident they’ll be benefited from this website.
Great blog here! Additionally your site lots up very fast!
What web host are you the usage of? Can I get your associate link on your
host? I wish my website loaded up as fast as yours lol
Yesterday, while I was at work, my sister stole my iphone and tested to see if it can survive a twenty five foot drop, just so she can be a youtube sensation. My apple ipad is now destroyed and she has 83 views. I know this is completely off topic but I had to share it with someone!
Right now it sounds like Drupal is the best blogging platform available right now. (from what I’ve read) Is that what you are using on your blog?
bookmarked!!, I like your blog!
Right now it appears like BlogEngine is the top blogging platform available right now. (from what I’ve read) Is that what you are using on your blog?
Right now it sounds like WordPress is the preferred blogging platform out there right now. (from what I’ve read) Is that what you’re using on your blog?
Its just like you read my thoughts! It’s like reading about my family.
thank, I thoroughly enjoyed reading your article. I really appreciate your wonderful knowledge and the time you put into educating the rest of us.
Excellent article. Keep posting such kind of info on your page. Im really impressed by your site.
Just wish to say your article is as astounding. The clearness in your post is just great and i can assume you are an expert on this subject. Well with your permission let me to grab your RSS feed to keep updated with forthcoming post. Thanks a million and please carry on the rewarding work.
Greetings, have tried to subscribe to this websites rss feed but I am having a bit of a problem. Can anyone kindly tell me what to do?’
Just desire to say your article is as amazing. The clarity in your post is simply spectacular and i can assume you are an expert on this subject. Well with your permission let me to grab your RSS feed to keep up to date with forthcoming post. Thanks a million and please keep up the enjoyable work.
Simply desire to say your article is as amazing. The clearness in your post is simply excellent and i can assume you’re an expert on this subject. Well with your permission allow me to grab your RSS feed to keep up to date with forthcoming post. Thanks a million and please carry on the rewarding work.
Hi there. I’ve been playing for months with slot machines but patience is key. netbanking
Hi there, You have done an incredible job. I will certainly digg it and for my part recommend to my friends. I’m sure they will be benefited from this site.
Hi there, You’ve performed an incredible job. I will definitely digg it and for my part recommend to my friends. I am sure they will be benefited from this web site.
Excellent article. Keep posting such kind of information on your site. Im really impressed by your site.
A cool post there mate ! Thank you for posting.
Excellent article!! I am an avid reader of your website:D keep on posting that good content. and I’ll be a regular visitor for a very long time!!
Wow that was odd. I just wrote an really long comment but after I clicked submit my comment didn’t show up. Grrrr… well I’m not writing all that over again. Anyhow, just wanted to say fantastic blog!
Is it okay to put a portion of this on my weblog if perhaps I post a reference point to this web page?
Hey there, You have done a fantastic job. I’ll certainly digg it and personally suggest to my friends. I’m sure they’ll be benefited from this site.
Can I simply say what a relief to discover someone that really knows what they’re discussing over the internet. You actually realize how to bring a problem to light and make it important. A lot more people should look at this and understand this side of your story. I was surprised that you aren’t more popular given that you certainly possess the gift.
You certainly deserve a round of applause for your post and more specifically, your blog in general. Very high quality material!
We’re developing a conference, and it looks like you would be a great speaker.
I’m impressed, I need to say. Really rarely do I encounter a blog that’s both educational and entertaining, and let me tell you, you have hit the nail on the head.
Wow that was odd. I just wrote an really long comment but after I clicked submit my comment didn’t appear. Grrrr… well I’m not writing all that over again. Anyways, just wanted to say wonderful blog!
A neighbor of mine encouraged me to take a look at your blog site couple weeks ago, given that we both love similar stuff and I will need to say I am quite impressed.
I like your style!
I encountered your site after doing a search for new contesting using Google, and decided to stick around and read more of your articles. Thanks for posting, I have your site bookmarked now.
Well, I don’t know if that’s going to work for me, but definitely worked for you! 🙂 Excellent post!
Currently it appears like Expression Engine is the preferred blogging platform out there right now. (from what I’ve read) Is that what you’re using on your blog?
This is very interesting, You’re an overly professional blogger.
I have joined your feed and sit up for searching for extra of
your wonderful post. Additionally, I’ve shared your website in my social networks
Excellent post. Keep posting such kind of info on your blog. Im really impressed by it.
Hey just wanted to give you a brief heads up and let you know a few of the pictures aren’t loading correctly. I’m not sure why but I think its a linking issue. I’ve tried it in two different web browsers and both show the same results.
Hey there, You’ve performed a great job. I’ll certainly digg it and in my view recommend to my friends. I am sure they’ll be benefited from this web site.
Greate article. Keep posting such kind of info on your site. Im really impressed by your site.
Wow that was odd. I just wrote an really long comment but after I clicked submit my comment didn’t appear. Grrrr… well I’m not writing all that over again. Anyway, just wanted to say great blog!
Thanks for the marvelous posting! I seriously enjoyed reading it, you happen to be a great author. I will always bookmark your blog and definitely will come back in the foreseeable future. I want to encourage yourself to continue your great posts, have a nice weekend!
At this time it seems like Expression Engine is the preferred blogging platform out there right now. (from what I’ve read) Is that what you are using on your blog?
The league tables are always up to date, love it. ⚽⚽⚽
Aw, this was a very nice post. Spending some time and actual effort to create a really good article… but what can I say… I procrastinate a lot and never manage to get anything done.
An outstanding share! I have just forwarded this onto a colleague who has been conducting a little research on this. And he actually bought me breakfast simply because I found it for him… lol. So allow me to reword this…. Thanks for the meal!! But yeah, thanks for spending time to discuss this issue here on your site.
Just what I needed to know thank you for this.
Following BPL cricket from Bangladesh! 🔥🔥🔥
We’re developing a conference, and it looks like you would be a great speaker.
Thanks for another great post. Where else may anybody get that type of info in such an ideal way of writing? I have a presentation next week, and I’m at the search for such information.
I just couldn’t leave your website before suggesting that I really enjoyed the usual information an individual supply on your visitors? Is gonna be back often in order to investigate cross-check new posts
I like your style!
bookmarked!!, I like your web site!
Hi there, You have performed an incredible job. I will definitely digg it and individually recommend to my friends. I’m sure they’ll be benefited from this web site.
It’s going to be finish of mine day, but before finish I am reading this wonderful piece of writing to improve my knowledge.
Excellent article. Keep writing such kind of information on your blog. Im really impressed by your site.
I like this weblog very much so much great info .
I love your blog. It looks every informative.
It’s hard to come by experienced people in this particular subject, however, you sound like you know what you’re talking about! Thanks
Thank you pertaining to sharing the following great subject matter on your website. I ran into it on google. I am going to check to come back after you publish additional aricles.
That is really fascinating, You’re an excessively skilled blogger. I’ve joined your rss feed and look forward to in the hunt for extra of your magnificent post. Additionally, I’ve shared your website in my social networks!
This is an awesome entry. Thank you very much for the supreme post provided! I was looking for this entry for a long time, but I wasn’t able to find a honest source.
Hey I know this is off topic but I was wondering if you knew of any widgets I could add to my blog that automatically tweet my newest twitter updates. I’ve been looking for a plug-in like this for quite some time and was hoping maybe you would have some experience with something like this. Please let me know if you run into anything. I truly enjoy reading your blog and I look forward to your new updates.
I would share your post with my sis.
I believe this web site has some really wonderful info for everyone : D.
I am glad to be a visitor on this website!, regards for this rare information!
I do not even understand how I stopped up right here, however I thought this put up was good. I don’t recognise who you might be but certainly you’re going to a well-known blogger when you aren’t already. Cheers!
Hey I know this is off topic but I was wondering if you knew of any widgets I could add to my blog that automatically tweet my newest twitter updates. I’ve been looking for a plug-in like this for quite some time and was hoping maybe you would have some experience with something like this. Please let me know if you run into anything. I truly enjoy reading your blog and I look forward to your new updates.
Hey I know this is off topic but I was wondering if you knew of any widgets I could add to my blog that automatically tweet my newest twitter updates. I’ve been looking for a plug-in like this for quite some time and was hoping maybe you would have some experience with something like this. Please let me know if you run into anything. I truly enjoy reading your blog and I look forward to your new updates.
The timeout was used perfectly to draw up a play. Goosebumps!
Aw, this was an extremely good post. Finding the time and actual effort to generate a very good article… but what can I say… I procrastinate a lot and don’t manage to get anything done.
Hey I know this is off topic but I was wondering if you knew of any widgets I could add to my blog that automatically tweet my newest twitter updates. I’ve been looking for a plug-in like this for quite some time and was hoping maybe you would have some experience with something like this. Please let me know if you run into anything. I truly enjoy reading your blog and I look forward to your new updates.
Can I just say what a relief to seek out someone who actually knows what theyre speaking about on the internet. You positively know find out how to bring a problem to mild and make it important. Extra individuals have to read this and perceive this side of the story. I cant believe youre not more in style because you positively have the gift.
May I just say what a comfort to discover someone that really knows what they’re discussing on the net. You actually realize how to bring an issue to light and make it important. More people should check this out and understand this side of the story. I can’t believe you are not more popular given that you most certainly have the gift.
Currently it seems like Drupal is the preferred blogging platform out there right now. (from what I’ve read) Is that what you’re using on your blog?
Greate post. Keep writing such kind of info on your page. Im really impressed by your site.
At this time it seems like WordPress is the top blogging platform available right now. (from what I’ve read) Is that what you’re using on your blog?
Hey I know this is off topic but I was wondering if you knew of any widgets I could add to my blog that automatically tweet my newest twitter updates. I’ve been looking for a plug-in like this for quite some time and was hoping maybe you would have some experience with something like this. Please let me know if you run into anything. I truly enjoy reading your blog and I look forward to your new updates.
May I simply say what a comfort to uncover a person that really understands what they are talking about on the net. You actually realize how to bring an issue to light and make it important. More people must check this out and understand this side of your story. I was surprised that you aren’t more popular because you definitely possess the gift.
Wow that was odd. I just wrote an very long comment but after I clicked submit my comment didn’t show up. Grrrr… well I’m not writing all that over again. Anyways, just wanted to say great blog!
Hi, possibly i’m being a little off topic here, but I was browsing your site and it looks stimulating. I’m writing a blog and trying to make it look neat, but everytime I touch it I mess something up. Did you design the blog yourself?
Hi there just wanted to give you a quick heads up. The words in your content seem to be running off the screen in Opera. I’m not sure if this is a format issue or something to do with web browser compatibility but I thought I’d post to let you know. The style and design look great though! Hope you get the issue fixed soon. Thanks
Thank you for all the information was very accurate, just wondering if all this is possible.~
Developing a framework is important.
Spot on with this write-up, I actually assume this website needs far more consideration. I will in all probability be once more to learn rather more, thanks for that info.
Enjoyed studying this, very good stuff, thanks.
Aw, this was an extremely good post. Spending some time and actual effort to generate a very good article… but what can I say… I procrastinate a lot and never seem to get nearly anything done.
Hi there, You have done an excellent job. I’ll definitely digg it and individually recommend to my friends. I’m sure they will be benefited from this website.
Good day! This is my first comment here so I just wanted to give a quick shout out and say I really enjoy reading through your articles. Can you recommend any other blogs/websites/forums that cover the same subjects? Thanks a lot!
Wow, superb blog layout! How long have you been blogging for? you make blogging look easy. The overall look of your web site is excellent, let alone the content!
Wow that was strange. I just wrote an extremely long comment but after I clicked submit my comment didn’t appear. Grrrr… well I’m not writing all that over again. Anyway, just wanted to say wonderful blog!
Very often I go to see this blog. It very much is pleasant to me. Thanks the author
OK, you outline what is a big issue. But, can’t we develop more answers in the private sector?
Hey! awesome blog! I happen to be a daily visitor to your site (somewhat more like addict 😛 ) of this website. Just wanted to say I appreciate your blogs and am looking forward for more!
A person necessarily assist to make seriously posts I’d state. That is the first time I frequented your web page and up to now? I amazed with the research you made to create this particular submit amazing. Fantastic task!
A good web site with interesting content, that’s what I need. Thank you for making this web site, and I will be visiting again. Do you do newsletters? I Can’t find it.
I had fun reading this post. I want to see more on this subject.. Gives Thanks for writing this nice article.. Anyway, I’m going to subscribe to your rss and I wish you write great articles again soon.
A friend of mine advised me to review this site. And yes. it has some useful pieces of info and I enjoyed reading it.
Simply wish to say the frankness in your article is surprising.
At this time it looks like Movable Type is the preferred blogging platform available right now. (from what I’ve read) Is that what you’re using on your blog?
Aw, this was an incredibly nice post. Finding the time and actual effort to produce a really good article… but what can I say… I hesitate a whole lot and don’t manage to get nearly anything done.
You are one talented writer thank you for the post.
Easily, the post is really the greatest on this laudable topic. I concur with your conclusions and will thirstily look forward to your future updates. Saying thank will not just be sufficient, for the wonderful c lucidity in your writing. I will instantly grab your rss feed to stay privy of any updates. Solid work and much success in your business enterprise!
Magnificent beat ! Can I be your apprentice? Just kidding!
Hello this is kinda of off topic but I was wondering if blogs use WYSIWYG editors or if you have to manually code with HTML. I’m starting a blog soon but have no coding knowledge so I wanted to get advice from someone with experience. Any help would be enormously appreciated!
I’m not sure why but this web site is loading incredibly slow for me. Is anyone else having this issue or is it a issue on my end? I’ll check back later and see if the problem still exists.
Right now it looks like Drupal is the best blogging platform available right now. (from what I’ve read) Is that what you are using on your blog?
Great info! Keep post great articles.
Admiring the time and energy you put into your website and in depth information you offer.
It’s nice to come across a blog every once in a while that isn’t the
same outdated rehashed material. Excellent read! I’ve saved your site and
I’m adding your RSS feeds to my Google account.
Excellent pieces. Keep posting such kind of information on your blog. Im really impressed by your blog.
Right now it sounds like Drupal is the top blogging platform out there right now. (from what I’ve read) Is that what you’re using on your blog?
Your article helped me a lot, is there any more related content? Thanks!
I am sure this post has touched all the internet users, its really really nice
piece of writing on building up new website.
Currently it appears like BlogEngine is the best blogging platform out there right now. (from what I’ve read) Is that what you’re using on your blog?
May I just say what a comfort to find someone that really understands what they’re talking about online. You actually realize how to bring a problem to light and make it important. More and more people should look at this and understand this side of your story. I was surprised that you’re not more popular since you most certainly have the gift.
Aw, this was an incredibly nice post. Taking the time and actual effort to make a superb article… but what can I say… I put things off a lot and don’t seem to get nearly anything done.
Hello there, You’ve done an incredible job. I will certainly digg it and individually recommend to my friends. I’m confident they will be benefited from this site.
Hi I am so happy I found your blog page, I really found you by error, while I was looking on Askjeeve for something else, Regardless I am here now and would just like to say cheers for a tremendous post and a all round exciting blog (I also love the theme/design), I don’t have time to read it all at the moment but I have bookmarked it and also added your RSS feeds, so when I have time I will be back to read a lot more, Please do keep up the superb job.
With havin so much written content do you ever run into any problems of plagorism or copyright infringement? My site has a lot of exclusive content I’ve either created myself or outsourced but it appears a lot of it is popping it up all over the internet without my permission. Do you know any methods to help prevent content from being stolen? I’d truly appreciate it.
Very good article. I certainly love this site. Keep it up!
We’re a group of volunteers and opening a new scheme in our community. Your site provided us with valuable info to work on. You’ve done an impressive job and our whole community will be thankful to you.
Excellent article. Keep writing such kind of info on your page. Im really impressed by your site.
May I simply say what a relief to uncover someone who really knows what they are talking about on the web. You definitely know how to bring an issue to light and make it important. More and more people need to read this and understand this side of your story. It’s surprising you aren’t more popular since you most certainly possess the gift.
Ahaa, its nice conversation concerning this article at this place at this blog, I have read all that,
so now me also commenting here.
Very soon this site will be famous amid all blogging and site-building people, due to it’s good posts
Right away I am going to do my breakfast, afterward having my breakfast coming over again to read further news.
一个实用的工作流:用Cryptify Hub快速找到某个AI工具的官网,然后去官网查看功能介绍和定价;或者找到某个新项目的推特和Discord链接,然后自己去观察社区活跃度。导航站的价值在于效率,而非决策。
Wow that was odd. I just wrote an extremely long comment but after I clicked submit my comment didn’t appear. Grrrr… well I’m not writing all that over again. Anyways, just wanted to say great blog!
Wow, awesome blog layout! How long have you been blogging for? you made blogging look easy. The overall look of your web site is excellent, let alone the content!
Fantastic site you have here but I was curious about if you knew of any message boards that cover the same topics talked about in this
article? I’d really like to be a part of online community where I can get responses from
other knowledgeable individuals that share the same interest.
If you have any recommendations, please let me know.
Thanks a lot!
The vice-captain for matches where a bowler is expected to take a five-wicket haul — dual points.
I love your blog.. very nice colors & theme. Did you make this website
yourself or did you hire someone to do it for you?
Plz respond as I’m looking to construct my own blog
and would like to find out where u got this from. many thanks
Wow that was odd. I just wrote an extremely long comment but after I clicked submit my comment didn’t appear. Grrrr… well I’m not writing all that over again. Anyways, just wanted to say fantastic blog!
Hello there, You have done an incredible job. I’ll certainly digg it and individually recommend to my friends. I am confident they’ll be benefited from this site.
Hello there, You have performed an excellent job. I will definitely digg it and in my view suggest to my friends. I am sure they will be benefited from this site.
Pretty! This has been an extremely wonderful post. Thank you for providing this information.
It’s the best time to make a few plans for the longer term
and it’s time to be happy. I have read this submit and if I
could I wish to counsel you few attention-grabbing issues or suggestions.
Perhaps you can write next articles regarding this article.
I desire to learn more things about it!
Aw, this was an extremely nice post. Taking the time and actual effort to make a superb article… but what can I say… I hesitate a whole lot and never seem to get anything done.
This piece of writing will help the internet users
for setting up new weblog or even a weblog from start to end.
It’s appropriate time to make some plans for the future and it’s time to be happy.
I’ve read this publish and if I may I wish to suggest you few fascinating things or suggestions.
Maybe you can write next articles referring to this article.
I desire to read more issues approximately it!
I am regular reader, how are you everybody? This paragraph posted at this
website is in fact pleasant.
Right now it looks like WordPress is the best blogging platform available right now. (from what I’ve read) Is that what you are using on your blog?
At this time it seems like Drupal is the preferred blogging platform out there right now. (from what I’ve read) Is that what you’re using on your blog?
Hey I know this is off topic but I was wondering if you knew of any widgets I could add to my blog that automatically tweet my newest twitter updates. I’ve been looking for a plug-in like this for quite some time and was hoping maybe you would have some experience with something like this. Please let me know if you run into anything. I truly enjoy reading your blog and I look forward to your new updates.
Unquestionably believe that which you said. Your favorite reason seemed to be on the net the easiest thing to be aware of. I say to you, I certainly get annoyed while people consider worries that they plainly don’t know about. You managed to hit the nail on the head. Will probably be back to get more. Thanks
A quad bike ride in Dubai would be a great break from malls and city tours. It gives travelers a chance to enjoy nature and adventure. I think it adds a very different side to a Dubai holiday.
Nicely put, With thanks!
Hey I know this is off topic but I was wondering if you knew of any widgets I could add to my blog that automatically tweet my newest twitter updates. I’ve been looking for a plug-in like this for quite some time and was hoping maybe you would have some experience with something like this. Please let me know if you run into anything. I truly enjoy reading your blog and I look forward to your new updates.
Greate article. Keep posting such kind of info on your page. Im really impressed by your site.
Aw, this was an incredibly good post. Spending some time and actual effort to make a very good article… but what can I say… I put things off a lot and never manage to get anything done.
Excellent site. Lots of helpful information here.
I am sending it to several buddies ans also sharing in delicious.
And naturally, thanks on your sweat!
Wow that was strange. I just wrote an extremely long comment but after I clicked submit my comment didn’t show up. Grrrr… well I’m not writing all that over again. Anyways, just wanted to say great blog!
WOW just what I was looking for. Came here by searching
for welcome offer
Appreciate you for sharing most of these wonderful content. In addition, the ideal travel plus medical insurance system can often ease those fears that come with traveling abroad. Your medical crisis can before long become very costly and that’s guaranteed to quickly put a financial stress on the family’s finances. Putting in place the great travel insurance deal prior to setting off is definitely worth the time and effort. Thanks
Hey I know this is off topic but I was wondering if you knew of any widgets I could add to my blog that automatically tweet my newest twitter updates. I’ve been looking for a plug-in like this for quite some time and was hoping maybe you would have some experience with something like this. Please let me know if you run into anything. I truly enjoy reading your blog and I look forward to your new updates.
Once I initially commented I clicked the -Notify me when new comments are added- checkbox and now every time a remark is added I get four emails with the identical comment. Is there any approach you may take away me from that service? Thanks!
Your Dream11 journey deserves to be backed by solid legal understanding.
Currently it looks like Drupal is the best blogging platform out there right now. (from what I’ve read) Is that what you’re using on your blog?
Hello there, You have performed an excellent job. I’ll definitely digg it and personally suggest to my friends. I am confident they’ll be benefited from this web site.
Wow that was odd. I just wrote an really long comment but after I clicked submit my comment didn’t appear. Grrrr… well I’m not writing all that over again. Anyhow, just wanted to say superb blog!
Howdy would you mind stating which blog platform you’re using?
I’m looking to start my own blog in the near
future but I’m having a tough time selecting between BlogEngine/Wordpress/B2evolution and Drupal.
The reason I ask is because your layout seems different then most blogs
and I’m looking for something completely unique.
P.S My apologies for being off-topic but I had to ask!
Can I simply just say what a relief to discover somebody that genuinely understands what they’re discussing over the internet. You certainly know how to bring an issue to light and make it important. More people need to check this out and understand this side of your story. I was surprised that you are not more popular given that you surely possess the gift.
My relatives every time say that I am killing my time here at web, except I know I am getting experience all the
time by reading such good posts.
Thanks for another great post. Where else may anybody get that type of info in such an ideal way of writing? I have a presentation next week, and I’m at the search for such information.
always i used to read smaller content that as well clear their motive, and that is also happening with this article which I
am reading now.
Wonderful blog! I found it while browsing on Yahoo News.
Do you have any tips on how to get listed in Yahoo
News? I’ve been trying for a while but I never seem to get there!
Thank you
Hey, I simply hopped over to your website by way of StumbleUpon. No longer one thing I’d normally learn, but I preferred your thoughts none the less. Thanks for making one thing worth reading.
A fascinating discussion is worth comment. There’s no doubt that that you ought to publish more
on this topic, it might not be a taboo matter but typically people do not discuss such subjects.
To the next! Best wishes!!
Hi there, I found your website via Google whilst looking
for a comparable matter, your site came up, it appears good.
I’ve bookmarked it in my google bookmarks.
Hello there, simply changed into aware of your blog
thru Google, and located that it is really informative.
I’m gonna watch out for brussels. I’ll be grateful should you continue this in future.
Lots of other people will probably be benefited from your
writing. Cheers!
My brother recommended I might like this web site.
He was totally right. This submit actually made my day.
You can not consider simply how much time I had spent for
this info! Thank you!
Thanks for finally writing about > Dell backup
and recovery basic, the easy way to backup and restore
your data. – Tech Info & Reviews < Loved it!
Tremendous issues here. I am very happy to see your
post. Thank you a lot and I am having a look ahead to touch you.
Will you kindly drop me a e-mail?